# Acronis Backup Gateway With Neevcloud

Acronis Backup Gateway is a free-to-use component of [Acronis Cyber Infrastructure](https://www.acronis.com/en-us/cloud/backup/) for Acronis partners, which provides a software-defined storage solution to act as a gateway to store backups of various workloads, including variety of VMs, Servers, Workstations, and mobile devices.&#x20;

#### Pre Requisites <a href="#pre-requisites" id="pre-requisites"></a>

* Neevcloud Cloud Storage Account
  * Neevcloud Bucket - See our [Bucket Creation Guide](https://docs.neevcloud.com/neevcloud-products/storage/object-storage/create-bucket)
  * Access & Secret Key Pair - See our [Access Keys Guide](https://docs.neevcloud.com/neevcloud-products/access-details/s3-ec2-credentials)
* Acronis Cyber Protect Cloud Partner account - [Acronis Partner Page](https://www.acronis.com/en-us/partners/)
* Acronis Backup Gateway (VM or Bare Metal) - [Acronis Backup Gateway Guide](https://dl.acronis.com/u/storage2/html/AcronisStorage_2_quick_start_guide_en-US/index.html)
* Acronis Agent installed on a VM or Server you wish to protect - [Acronis Agent Install Guide](https://kb.acronis.com/content/55052)

***Note:** The data restoration process is handled by your specific backup software application. As there are many potential variables that will affect your unique environment, it is strongly recommended that you seek the guidance of your backup software's technical support team in the event that you encounter difficulty, or have application-specific inquiries.*

### &#x20;Reference Architecture <a href="#reference-architecture" id="reference-architecture"></a>

<figure><img src="https://1876135298-files.gitbook.io/~/files/v0/b/gitbook-x-prod.appspot.com/o/spaces%2FEC5NwtFshv6EATOemuUn%2Fuploads%2FoCd4pgtzLsaQTVWNeDit%2Fimage.png?alt=media&#x26;token=b5fea234-6419-4262-b269-d463076cc686" alt=""><figcaption></figcaption></figure>

### 1. Install Acronis Backup Gateway & Log In <a href="#id-1-install-acronis-backup-gateway-log-in" id="id-1-install-acronis-backup-gateway-log-in"></a>

1.1 Boot a VM or Bare Metal server from the Acronis Cyber Infrastructure ISO.

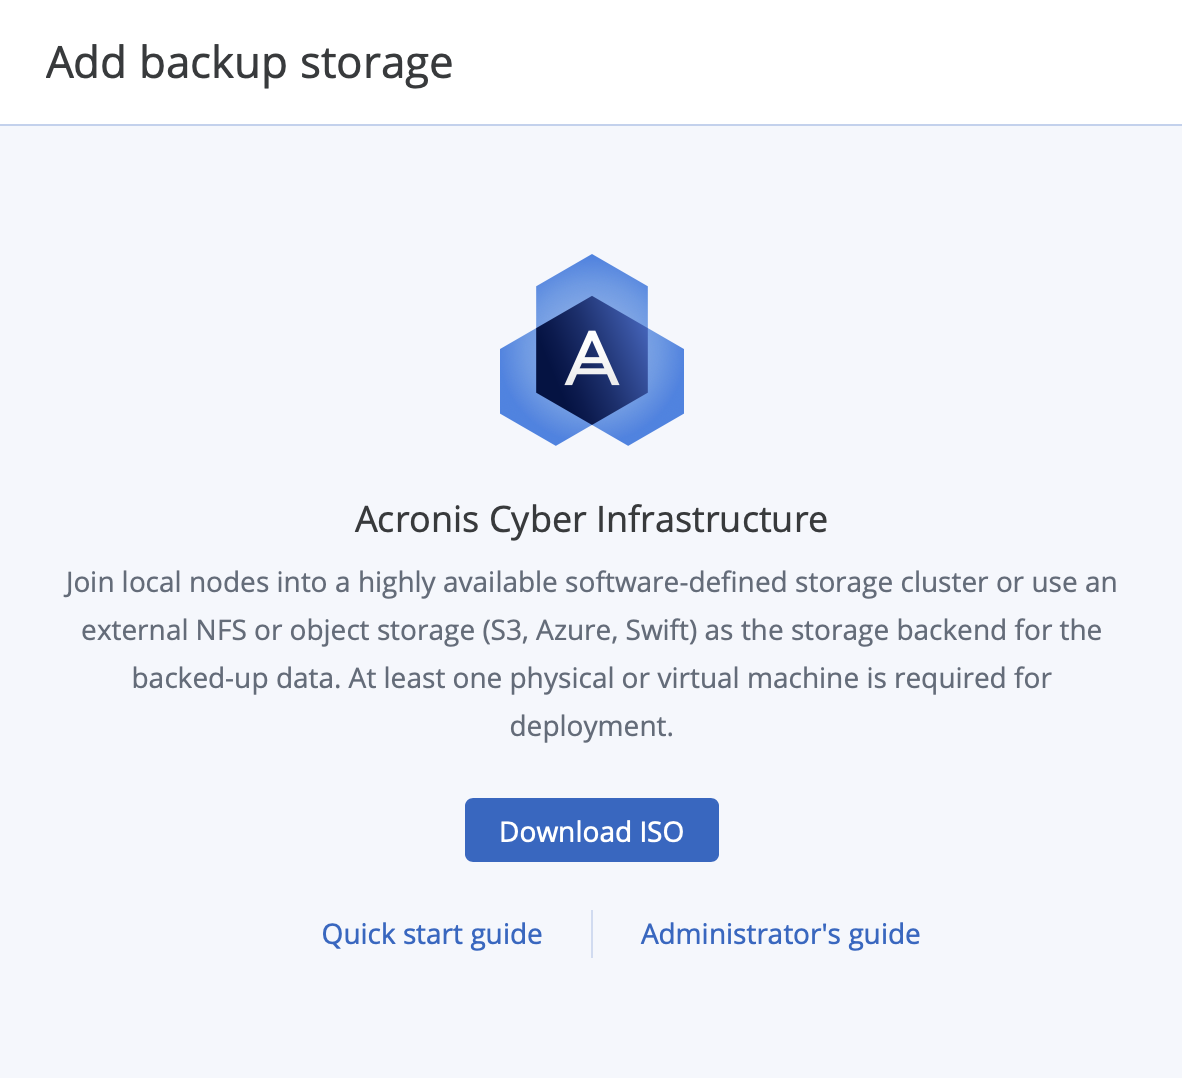
***Note:** You can download this ISO via your Acronis Cloud Partner Portal by going to "Settings > Locations > + Add Backup Storage", then clicking "Download ISO".*

<figure><img src="https://cdn.document360.io/bef0a1ea-7768-4d5a-b520-c4fe2f7fafad/Images/Documentation/8379762543387.png" alt=""><figcaption></figcaption></figure>

1.2 Mount the ISO to a VM, or Bare Metal server, wait for the machine to boot to the installer, and Accept the EULA, then click "Next."

<figure><img src="https://1876135298-files.gitbook.io/~/files/v0/b/gitbook-x-prod.appspot.com/o/spaces%2FEC5NwtFshv6EATOemuUn%2Fuploads%2FCSlUKe9B6yk0QI6THW0J%2Fimage.png?alt=media&#x26;token=aba3cb23-a4e8-43c5-8322-c32ddb1cc393" alt=""><figcaption></figcaption></figure>

<figure><img src="https://1876135298-files.gitbook.io/~/files/v0/b/gitbook-x-prod.appspot.com/o/spaces%2FEC5NwtFshv6EATOemuUn%2Fuploads%2FvzwNxIDaFvnm0SBvfhKH%2Fimage.png?alt=media&#x26;token=562e8bbb-432d-4b09-b398-2ea8a077a4a5" alt=""><figcaption></figcaption></figure>

1.3 Configure Network IP, Subnet, Gateway, and Host name, then click "Next".

<figure><img src="https://1876135298-files.gitbook.io/~/files/v0/b/gitbook-x-prod.appspot.com/o/spaces%2FEC5NwtFshv6EATOemuUn%2Fuploads%2FA0pjOxcsvIzatOX5aS7D%2Fimage.png?alt=media&#x26;token=7dd0db70-35d0-4e5a-9ece-ade6c0586b72" alt=""><figcaption></figcaption></figure>

1.4 Set the time zone, then click "Next".

<figure><img src="https://1876135298-files.gitbook.io/~/files/v0/b/gitbook-x-prod.appspot.com/o/spaces%2FEC5NwtFshv6EATOemuUn%2Fuploads%2FFfOVd1316SZkeu9b3hD2%2Fimage.png?alt=media&#x26;token=a3c61056-96b1-4295-84ec-b5480b658077" alt=""><figcaption></figcaption></figure>

1.5 Create a new cluster, by choosing "Yes, create a new cluster", then click "Next.

<figure><img src="https://1876135298-files.gitbook.io/~/files/v0/b/gitbook-x-prod.appspot.com/o/spaces%2FEC5NwtFshv6EATOemuUn%2Fuploads%2FmxkVZ9X7slX6zCdEjqEV%2Fimage.png?alt=media&#x26;token=8d712f75-7bfa-4d3d-810e-6fad1194906b" alt=""><figcaption></figcaption></figure>

1.6 Create a Web Control Panel password, then click "Next".

<figure><img src="https://1876135298-files.gitbook.io/~/files/v0/b/gitbook-x-prod.appspot.com/o/spaces%2FEC5NwtFshv6EATOemuUn%2Fuploads%2FjZoJvXOWyGZM4jEofZGM%2Fimage.png?alt=media&#x26;token=73a64be7-3e18-4d97-a01a-91f29e302323" alt=""><figcaption></figcaption></figure>

1.7 Choose the system disk for the OS, then click "Next".

**Note:** *For this demo, there is one system disk. For redundancy of your Backup Storage server, you may want to configure multiple disks in a RAID configuration. For specific setup questions, please be sure to reach out to your Acronis Cloud Partner representative.*

<figure><img src="https://1876135298-files.gitbook.io/~/files/v0/b/gitbook-x-prod.appspot.com/o/spaces%2FEC5NwtFshv6EATOemuUn%2Fuploads%2FgZNJ6j7NQU6ygoYmG82S%2Fimage.png?alt=media&#x26;token=c206ecec-c8ea-44d8-b03a-97a61703aebe" alt=""><figcaption></figcaption></figure>

1.8 Click "OK".

***Note:** This will format and erase the disk in preparation for installing an OS.*

<figure><img src="https://1876135298-files.gitbook.io/~/files/v0/b/gitbook-x-prod.appspot.com/o/spaces%2FEC5NwtFshv6EATOemuUn%2Fuploads%2F8uELWann9inx3y8hj2z6%2Fimage.png?alt=media&#x26;token=e594bd78-0ec8-43b3-954d-1fe9f27a891c" alt=""><figcaption></figcaption></figure>

1.9 Create a root password for the OS, then click Start installation.

***Note:** This process will take some time to complete, and the machine will eventually reboot to the installed OS.*

<figure><img src="https://1876135298-files.gitbook.io/~/files/v0/b/gitbook-x-prod.appspot.com/o/spaces%2FEC5NwtFshv6EATOemuUn%2Fuploads%2FFQr9budvkbEQtlPliN2h%2Fimage.png?alt=media&#x26;token=74fcc52b-2f9f-458f-90a5-882e6253f051" alt=""><figcaption></figcaption></figure>

1.10 After the installation has been completed. The machine will reboot, displaying the following login screen. Take note of the address for the Admin Panel.

***Note:** In the example, “**http\://\<Acronis\_Panel\_IP >:8888**” is the address for the Web Control Panel. Your panel address will differ, depending on your network configuration.*

<figure><img src="https://1876135298-files.gitbook.io/~/files/v0/b/gitbook-x-prod.appspot.com/o/spaces%2FEC5NwtFshv6EATOemuUn%2Fuploads%2F3uNbLhaoEDQGwrQnzSnv%2Fimage.png?alt=media&#x26;token=b658d97f-9ab3-4d15-8a7b-e6555cc05038" alt=""><figcaption></figcaption></figure>

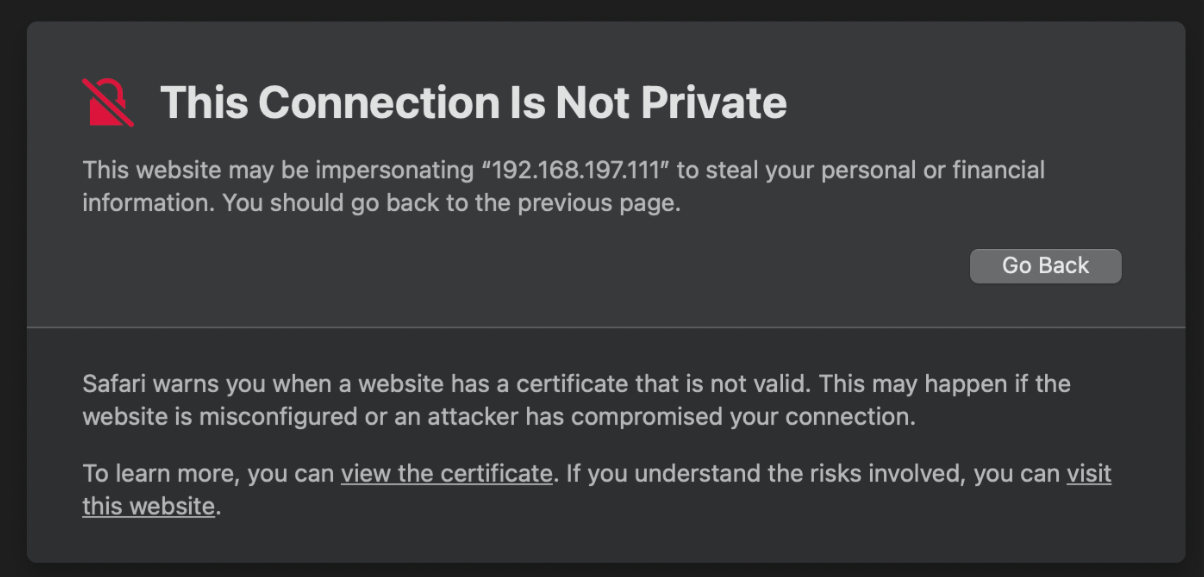
1.11 Visit the Web Control Panel address in your browser ***http\://\<Acronis\_Panel\_IP >:8888 for*** the self-signed certificate.

<figure><img src="https://cdn.document360.io/bef0a1ea-7768-4d5a-b520-c4fe2f7fafad/Images/Documentation/8375615987483.png" alt="" width="375"><figcaption></figcaption></figure>

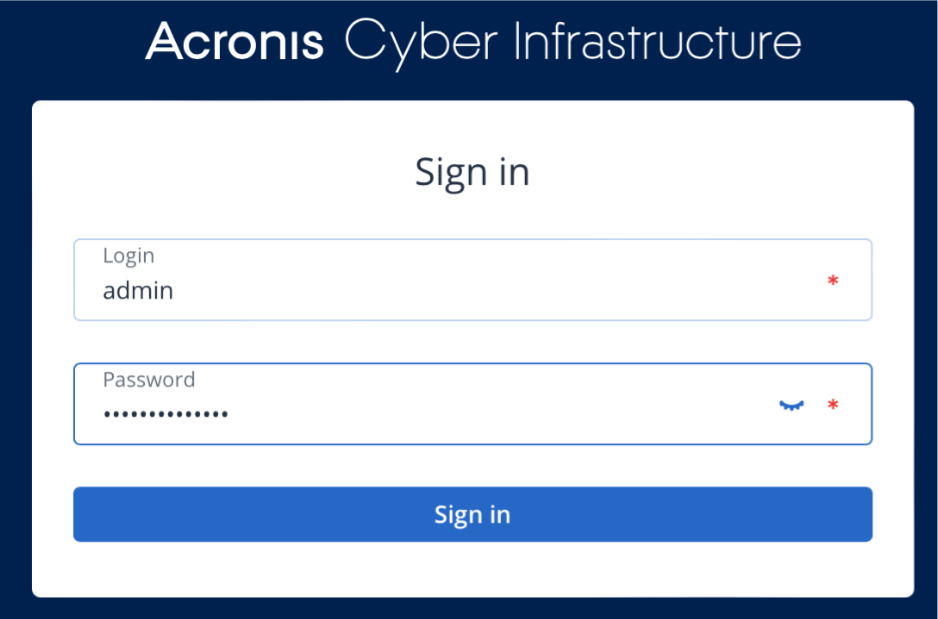
1.12 Log in with the username “**admin**” and the password you created for the Web Control Panel during the installation.

<figure><img src="https://cdn.document360.io/bef0a1ea-7768-4d5a-b520-c4fe2f7fafad/Images/Documentation/8375570141979.png" alt=""><figcaption></figcaption></figure>

### 2. Create a Storage Cluster <a href="#id-2-create-a-storage-cluster" id="id-2-create-a-storage-cluster"></a>

2.1 Click “Infrastructure > Nodes”, then click “Create storage cluster”.

<figure><img src="https://1876135298-files.gitbook.io/~/files/v0/b/gitbook-x-prod.appspot.com/o/spaces%2FEC5NwtFshv6EATOemuUn%2Fuploads%2Fr3muO83fBiLCGp1sk2Mf%2Fimage.png?alt=media&#x26;token=26d8d0fc-2ae3-4353-be7b-0ee71f64492f" alt=""><figcaption></figcaption></figure>

2.2 Input a name for the cluster, then click “**Create**”.

***Note:** It may take a few minutes to create the cluster.*

<figure><img src="https://1876135298-files.gitbook.io/~/files/v0/b/gitbook-x-prod.appspot.com/o/spaces%2FEC5NwtFshv6EATOemuUn%2Fuploads%2F0xngxwpCuAVLhN0MGfII%2Fimage.png?alt=media&#x26;token=57757594-2874-4c8d-bbb4-61d7bd727386" alt=""><figcaption></figcaption></figure>

### 3. Create Backup Storage <a href="#id-3-create-backup-storage" id="id-3-create-backup-storage"></a>

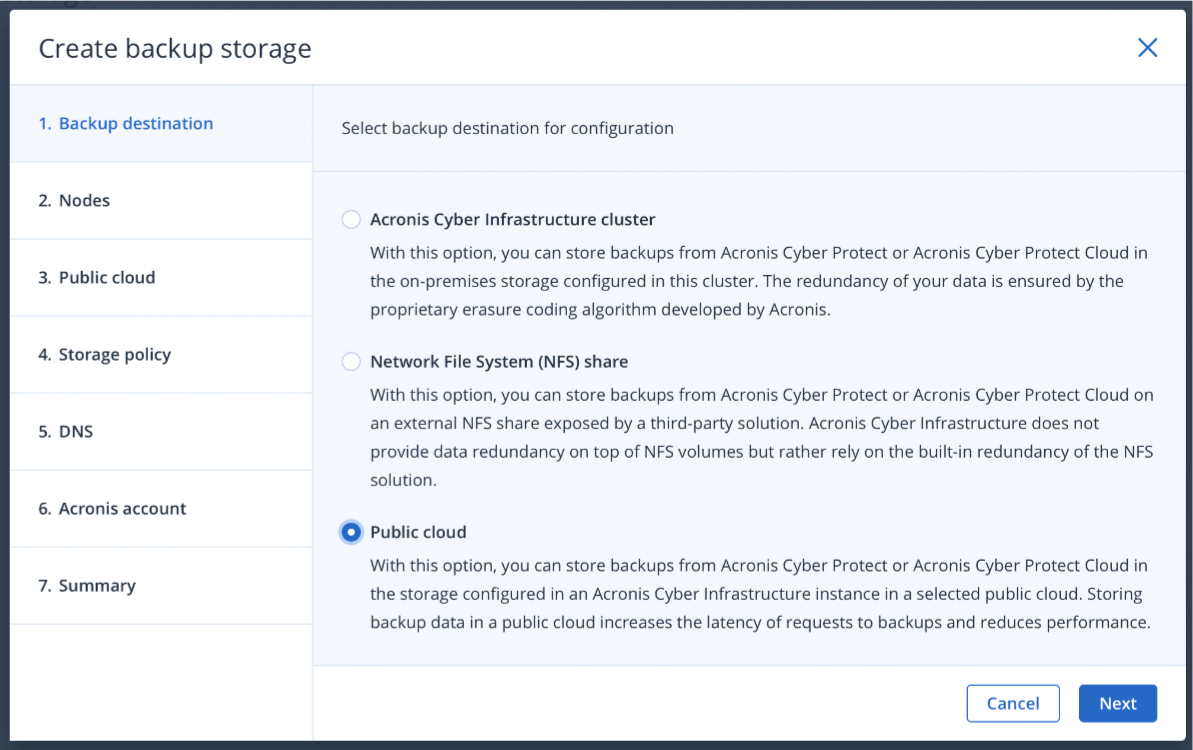
3.1 Click “**Storage Services > Backup Storage**”, then click “**Create backup storage**”.

<figure><img src="https://1876135298-files.gitbook.io/~/files/v0/b/gitbook-x-prod.appspot.com/o/spaces%2FEC5NwtFshv6EATOemuUn%2Fuploads%2F2AGLJgp62qUGf7tdXgjU%2Fimage.png?alt=media&#x26;token=168799a2-7f93-489d-aaca-34487757d72f" alt=""><figcaption></figcaption></figure>

3.2 Choose “**Public Cloud**”, then click “Next”.

<figure><img src="https://cdn.document360.io/bef0a1ea-7768-4d5a-b520-c4fe2f7fafad/Images/Documentation/8375879229211.png" alt=""><figcaption></figcaption></figure>

3.3 Check the box for your storage node, then click “Next”.

<figure><img src="https://1876135298-files.gitbook.io/~/files/v0/b/gitbook-x-prod.appspot.com/o/spaces%2FEC5NwtFshv6EATOemuUn%2Fuploads%2FfwaImHvmTt4J9HTlEHZq%2Fimage.png?alt=media&#x26;token=6ff2e011-5175-4369-a33d-4b79bc09a6cf" alt=""><figcaption></figcaption></figure>

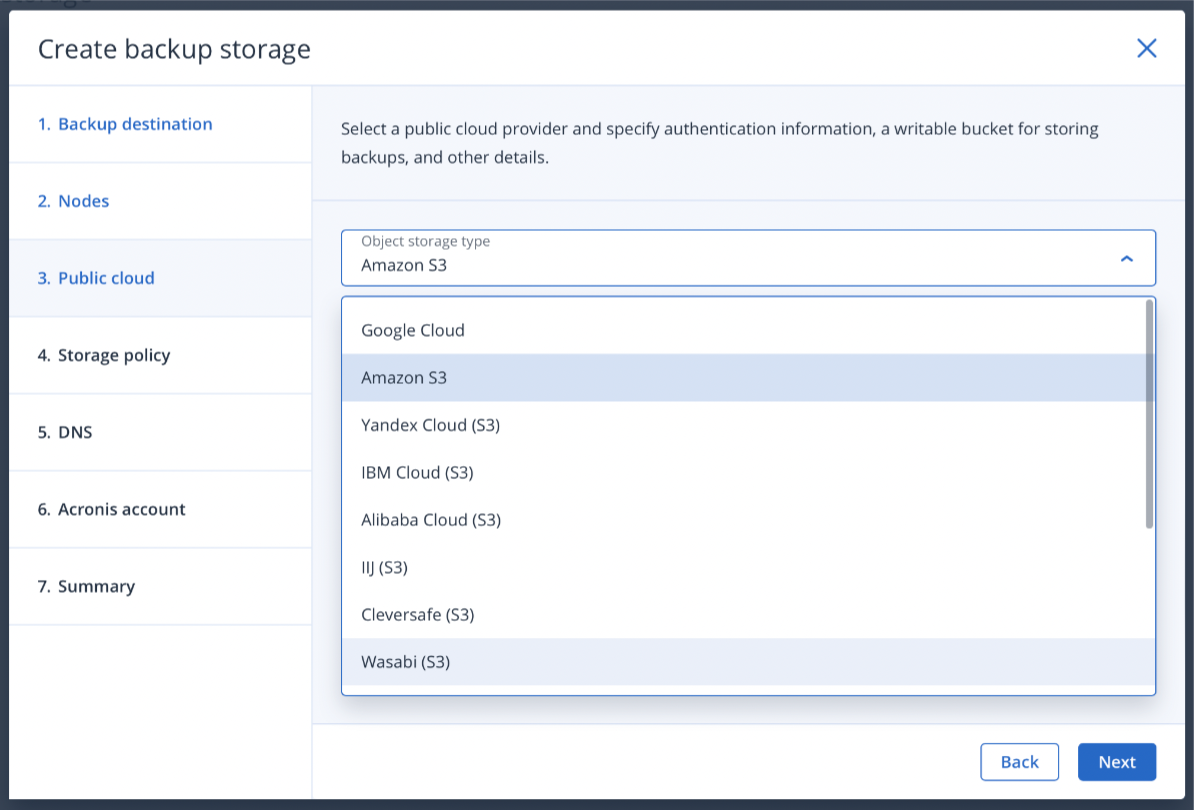
3.4 Select “**Wasabi**” in the dropdown.

<figure><img src="https://cdn.document360.io/bef0a1ea-7768-4d5a-b520-c4fe2f7fafad/Images/Documentation/8375897065883.png" alt=""><figcaption></figcaption></figure>

3.5 Enter the Endpoint URL, Bucket Name, Access Key, and Secret Key, then click “Next”.

<figure><img src="https://1876135298-files.gitbook.io/~/files/v0/b/gitbook-x-prod.appspot.com/o/spaces%2FEC5NwtFshv6EATOemuUn%2Fuploads%2FoDPMdKA2oSY4PnGOLuZS%2Fimage.png?alt=media&#x26;token=894920d1-f95f-46df-9964-cfd1e5dbb80c" alt=""><figcaption></figcaption></figure>

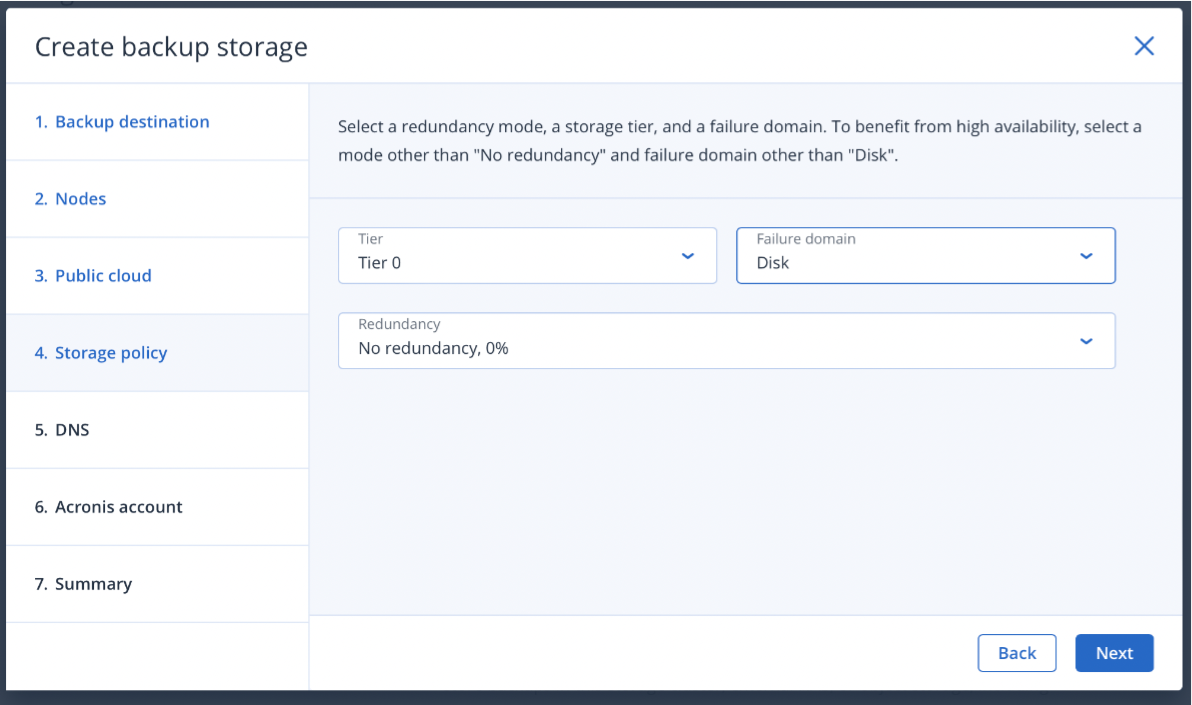
3.6 Choose appropriate redundancy settings by your organization’s policies, then click “Next”.

**Note:** *I have chosen "No Redundancy" for the sake of this example. You may wish to speak to your Acronis Representative to determine an appropriate redundancy level and hardware configuration for your Cyber Protect Infrastructure cluster.*

<figure><img src="https://cdn.document360.io/bef0a1ea-7768-4d5a-b520-c4fe2f7fafad/Images/Documentation/8375980650011.png" alt=""><figcaption></figcaption></figure>

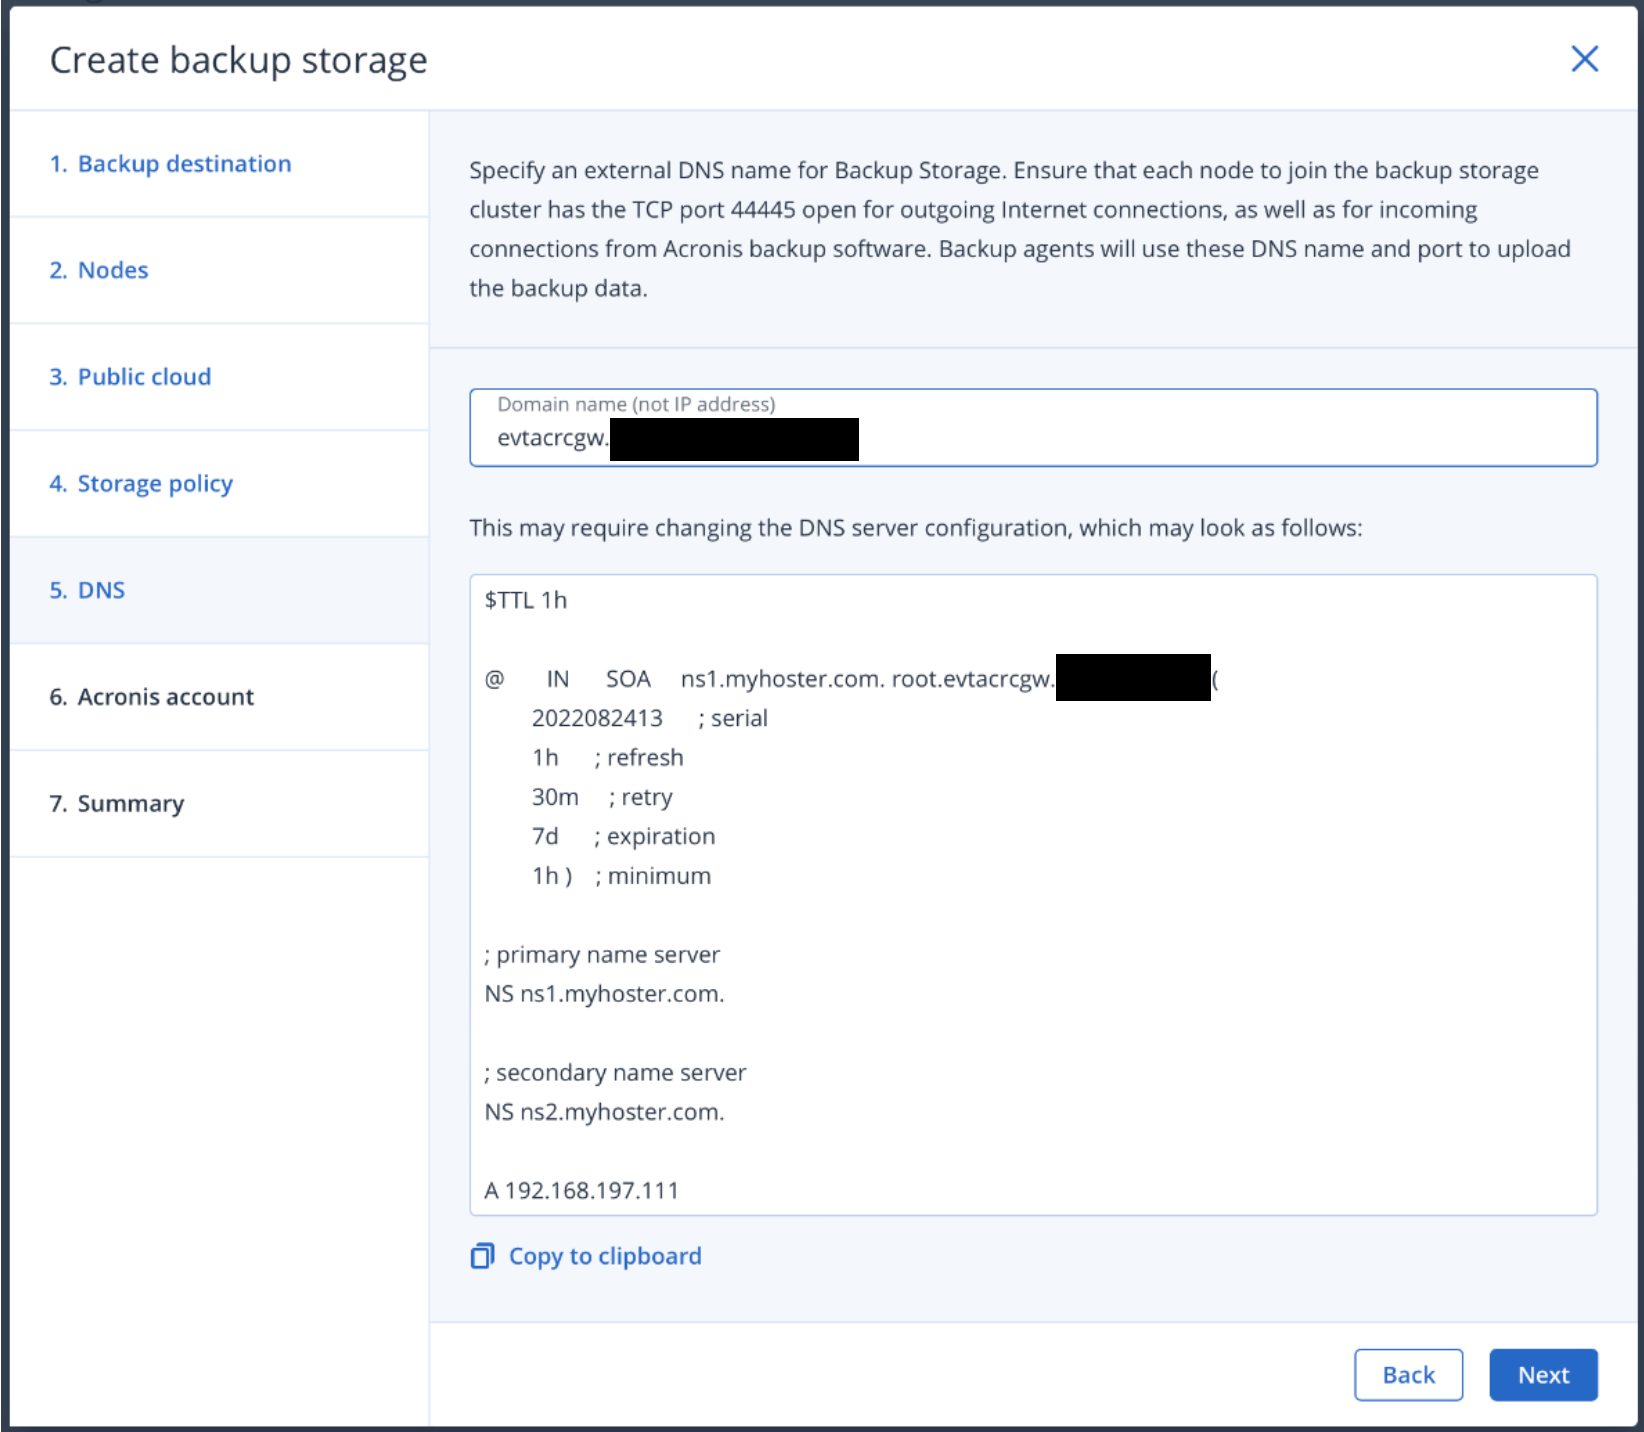
3.7 Enter a Domain Name for the backup server, then click “Next”.

***Note:** This must be a real DNS address, resolvable to the IP of your backup server, and the server must be able to accept inbound connections on port 44445.*

<figure><img src="https://cdn.document360.io/bef0a1ea-7768-4d5a-b520-c4fe2f7fafad/Images/Documentation/8376057608347.png" alt="" width="375"><figcaption></figcaption></figure>

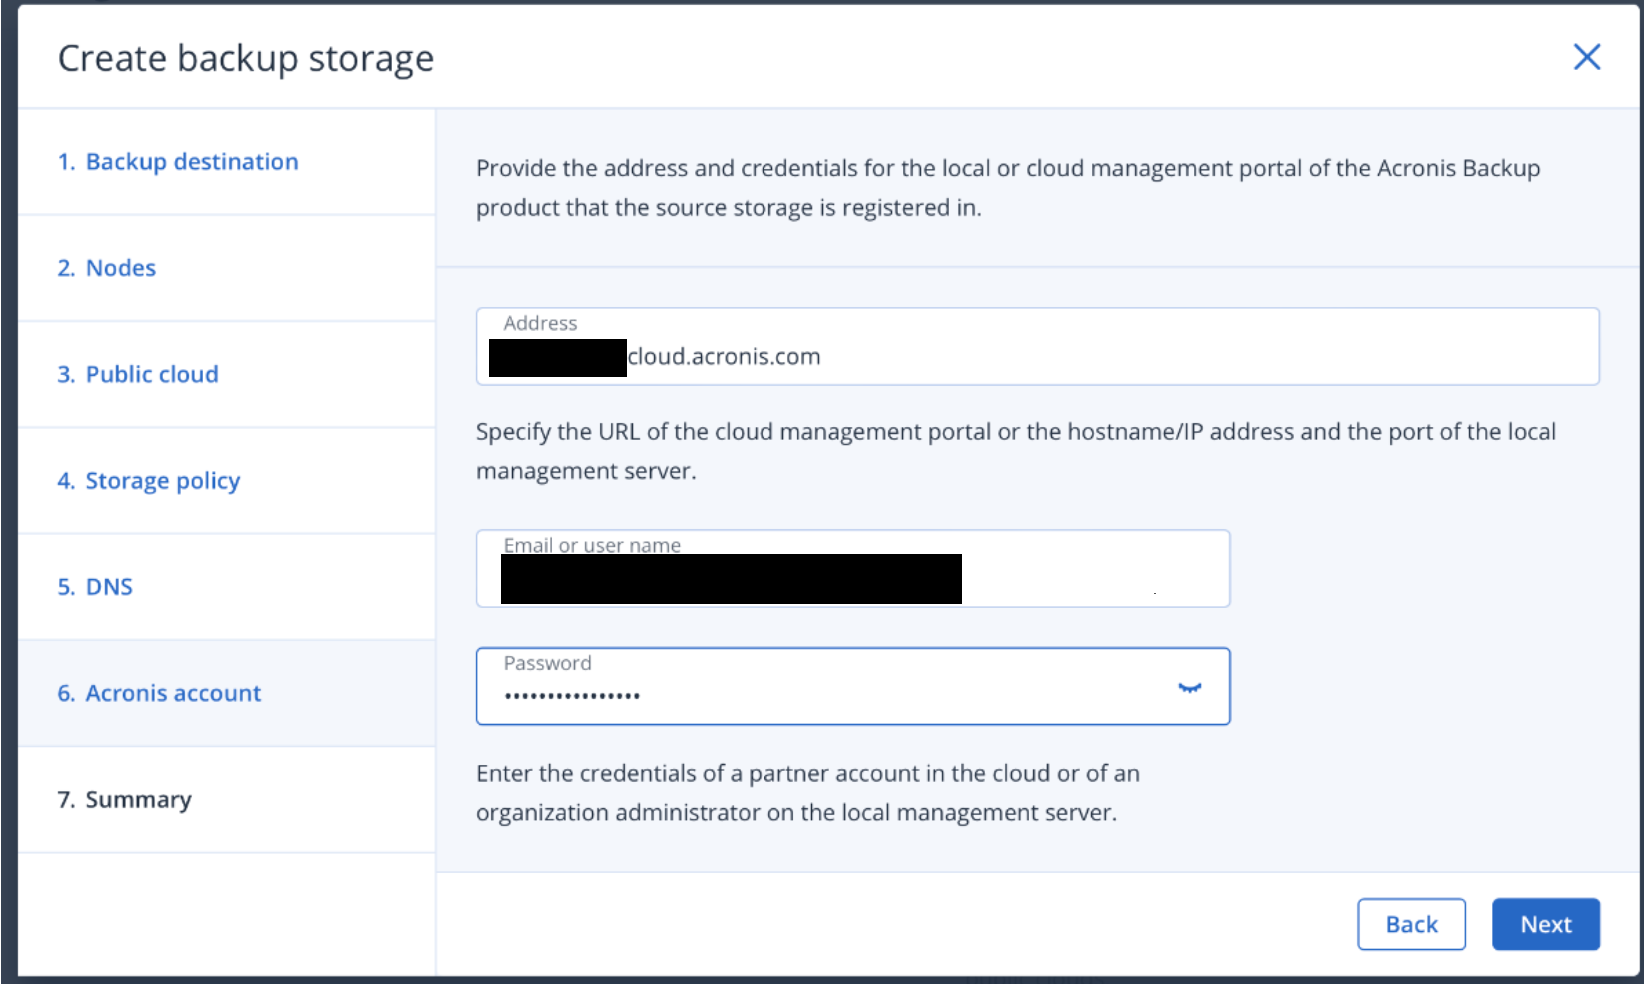
3.8 Enter your Acronis Partner Credentials, to register your Cyber Protect Infrastructure, then click “Next”.&#x20;

<figure><img src="https://cdn.document360.io/bef0a1ea-7768-4d5a-b520-c4fe2f7fafad/Images/Documentation/8376192555163.png" alt="" width="375"><figcaption></figcaption></figure>

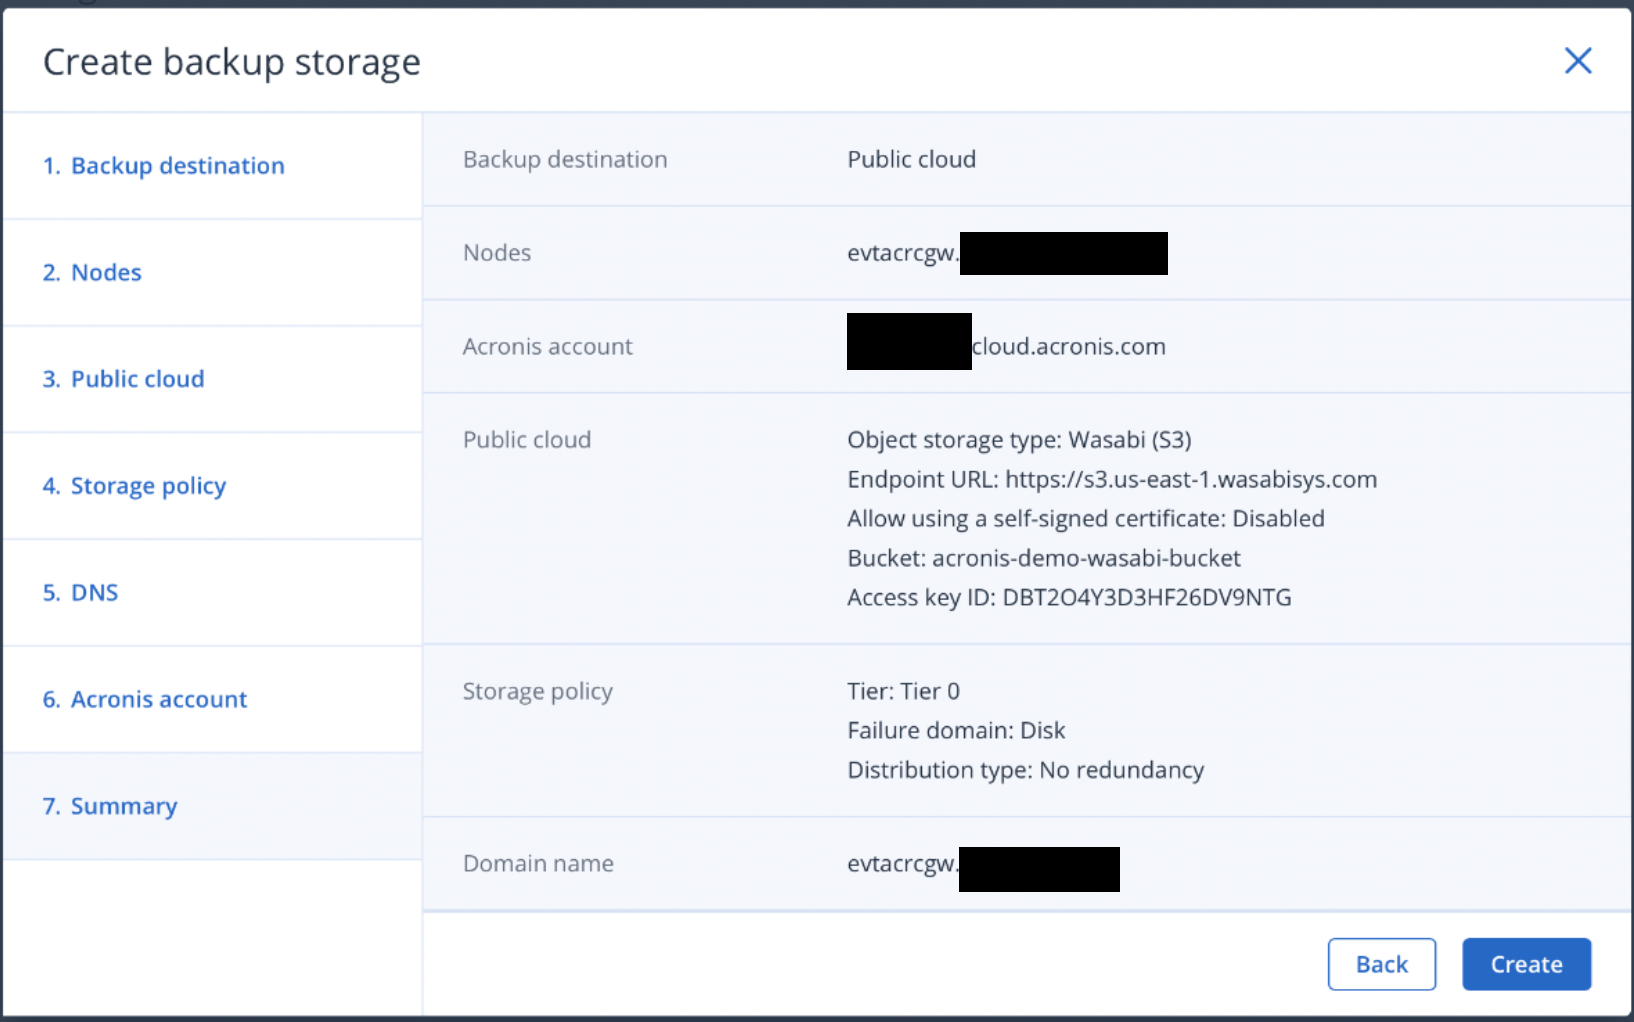
3.9 Review the “Summary”, then click “Create”.

<figure><img src="https://cdn.document360.io/bef0a1ea-7768-4d5a-b520-c4fe2f7fafad/Images/Documentation/8376323159451.png" alt="" width="375"><figcaption></figcaption></figure>

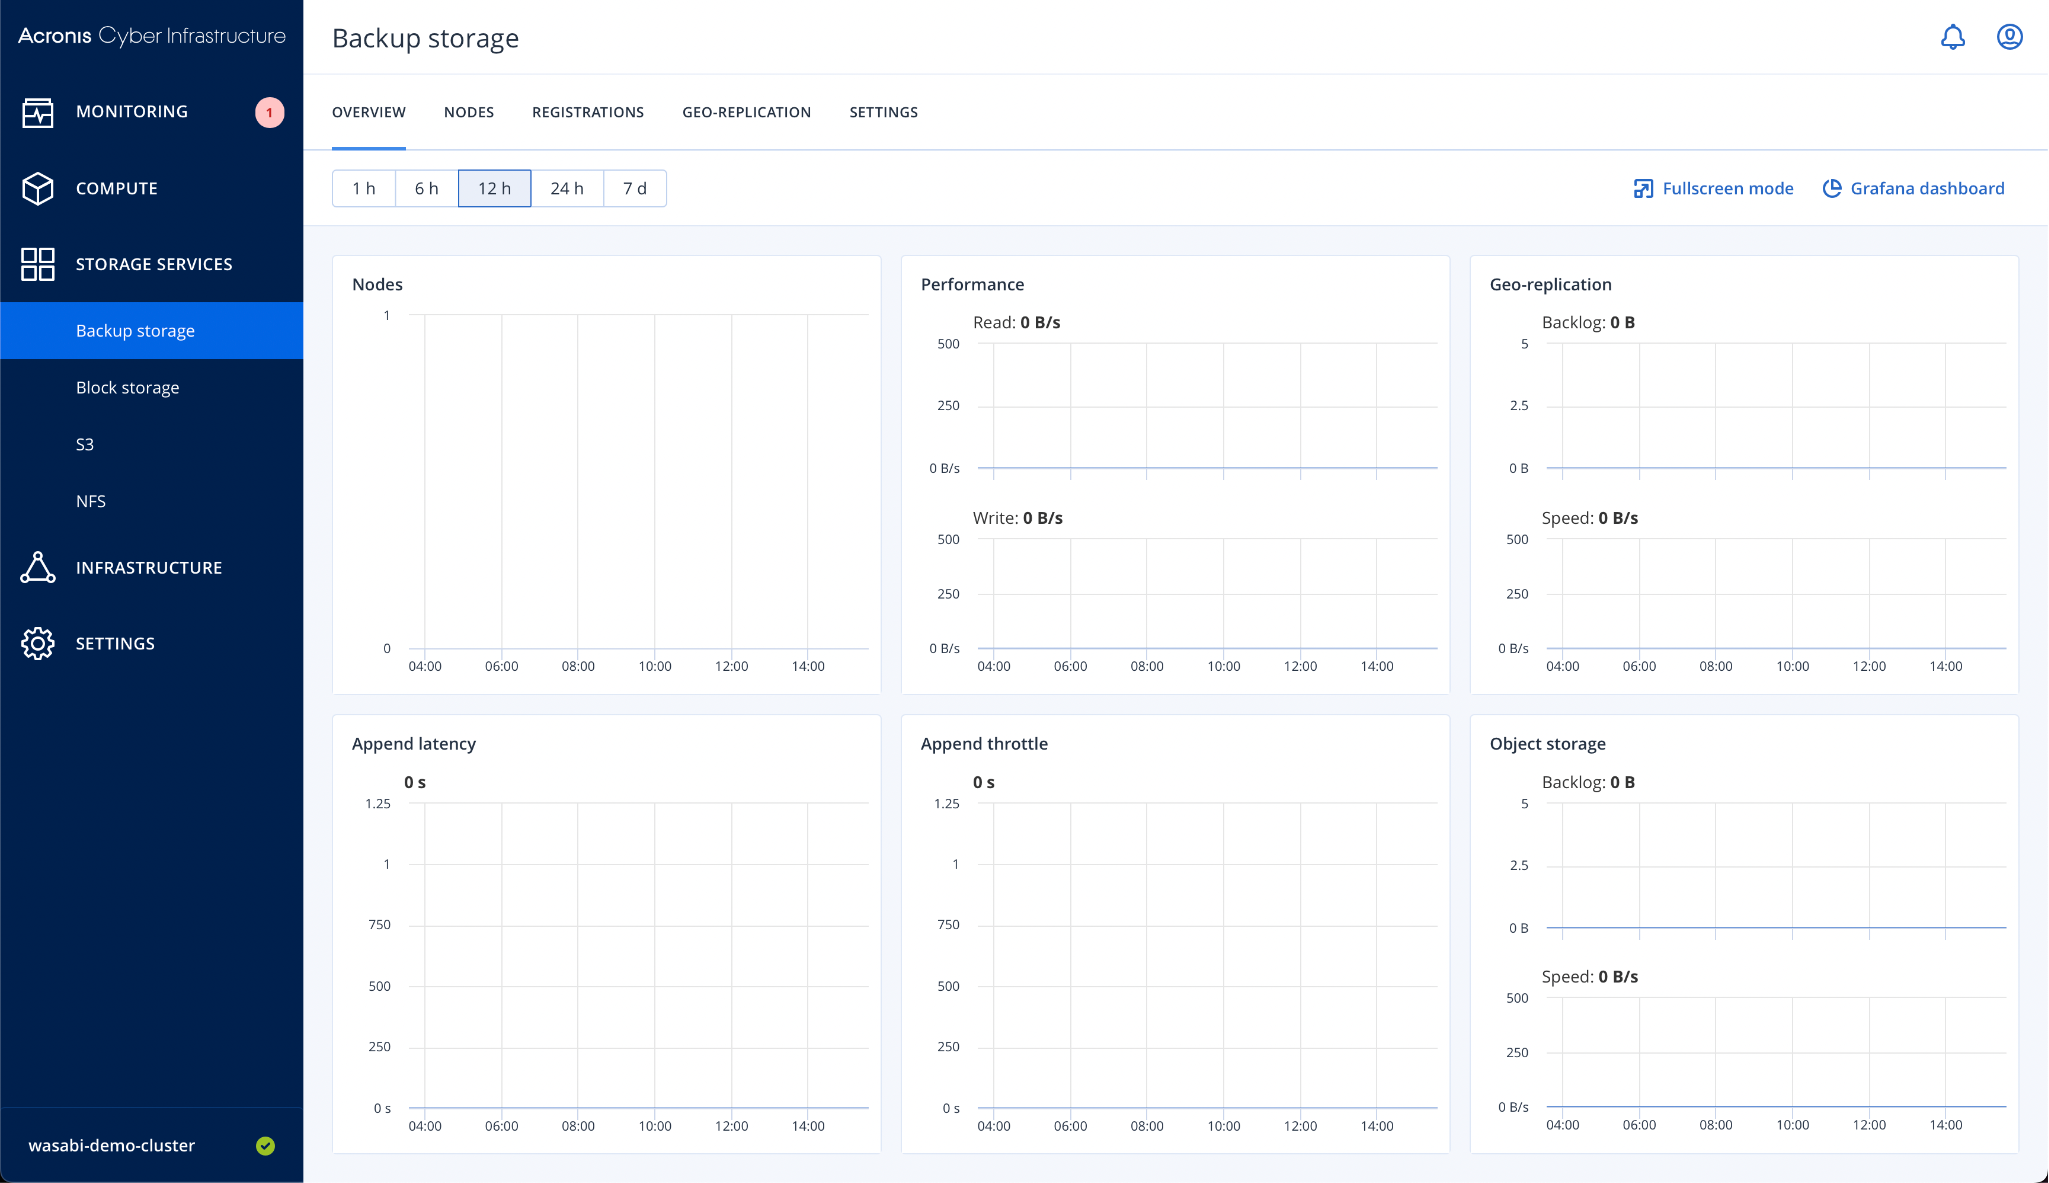
3.10 You are presented with the “Backup storage Overview" page.

<figure><img src="https://cdn.document360.io/bef0a1ea-7768-4d5a-b520-c4fe2f7fafad/Images/Documentation/8376523625499.png" alt=""><figcaption></figcaption></figure>

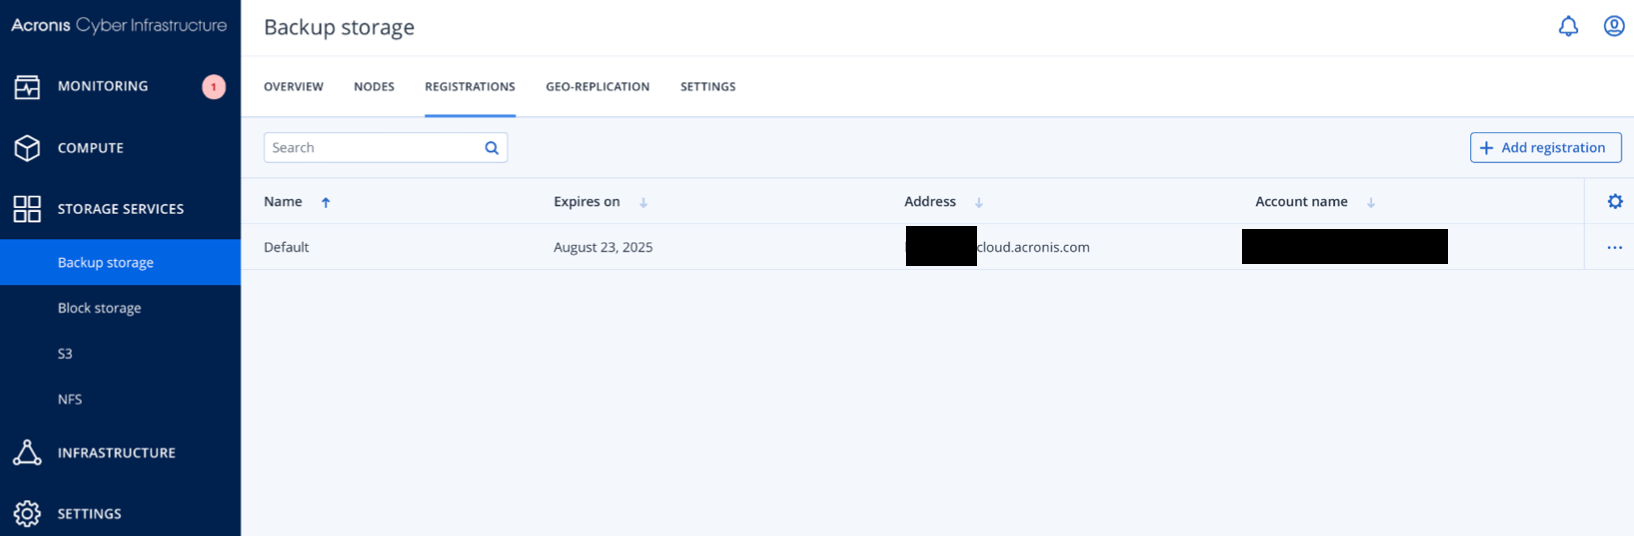
3.11 Confirm Registration by clicking the “Registration” Tab.

<figure><img src="https://cdn.document360.io/bef0a1ea-7768-4d5a-b520-c4fe2f7fafad/Images/Documentation/8376603475355.png" alt="" width="375"><figcaption></figcaption></figure>

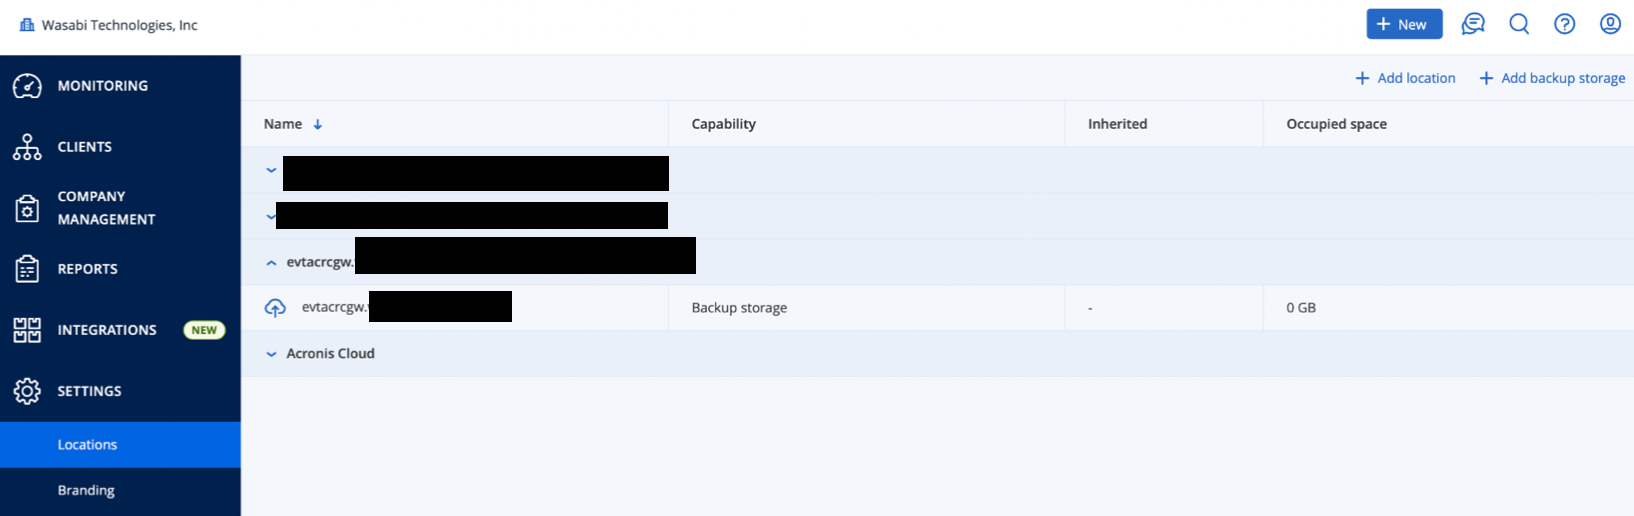
3.12 Log in to your Acronis Cyber Protect Cloud Partner account, and confirm that the location is available by clicking “Settings > Locations”.

<figure><img src="https://cdn.document360.io/bef0a1ea-7768-4d5a-b520-c4fe2f7fafad/Images/Documentation/8376628473883.png" alt="" width="375"><figcaption></figcaption></figure>

### 4. Create an Acronis Cloud Client account <a href="#id-4-create-an-acronis-cloud-client-account" id="id-4-create-an-acronis-cloud-client-account"></a>

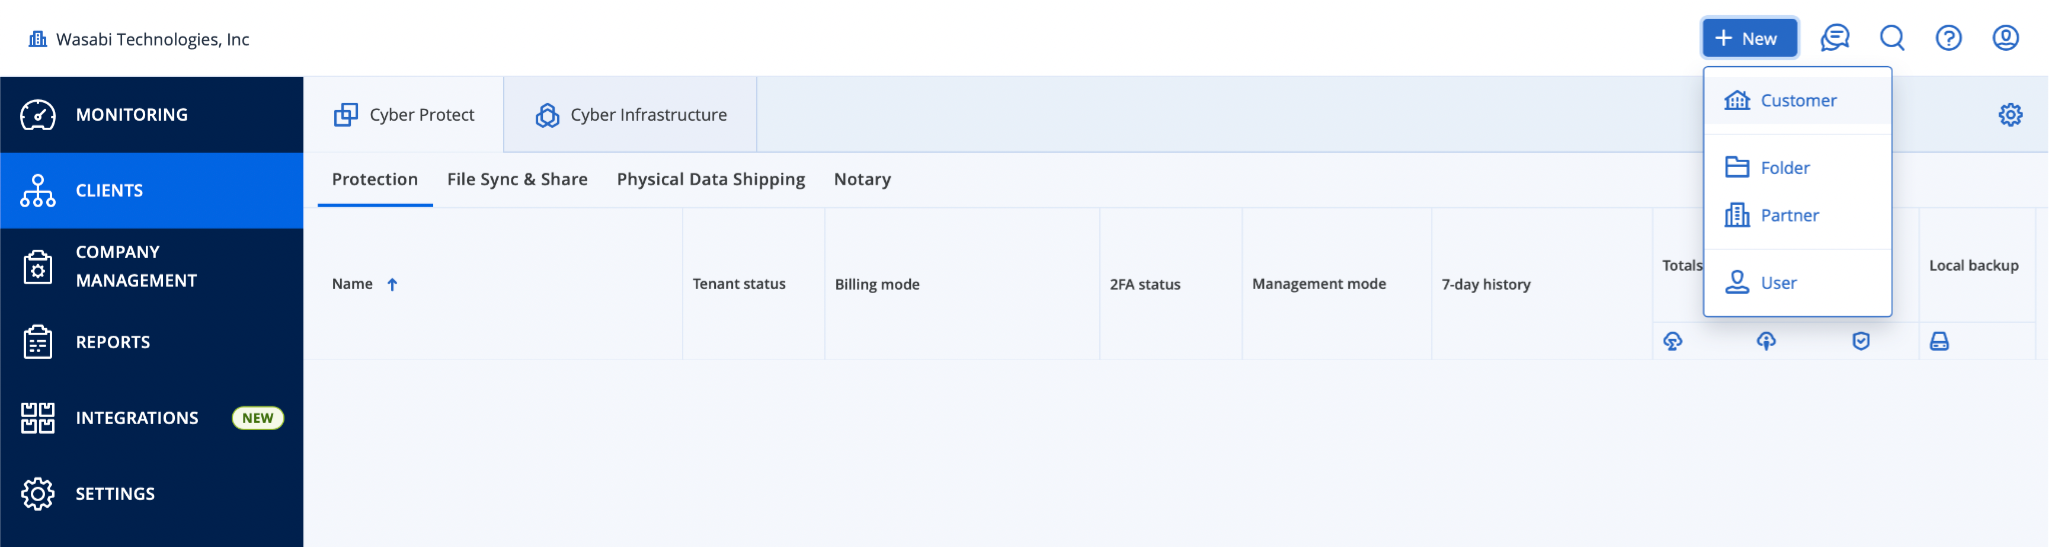
4.1 In the Acronis Cloud Partner Portal, click “Clients”, then click “+New > Customer”.

<figure><img src="https://cdn.document360.io/bef0a1ea-7768-4d5a-b520-c4fe2f7fafad/Images/Documentation/8376665950363.png" alt=""><figcaption></figcaption></figure>

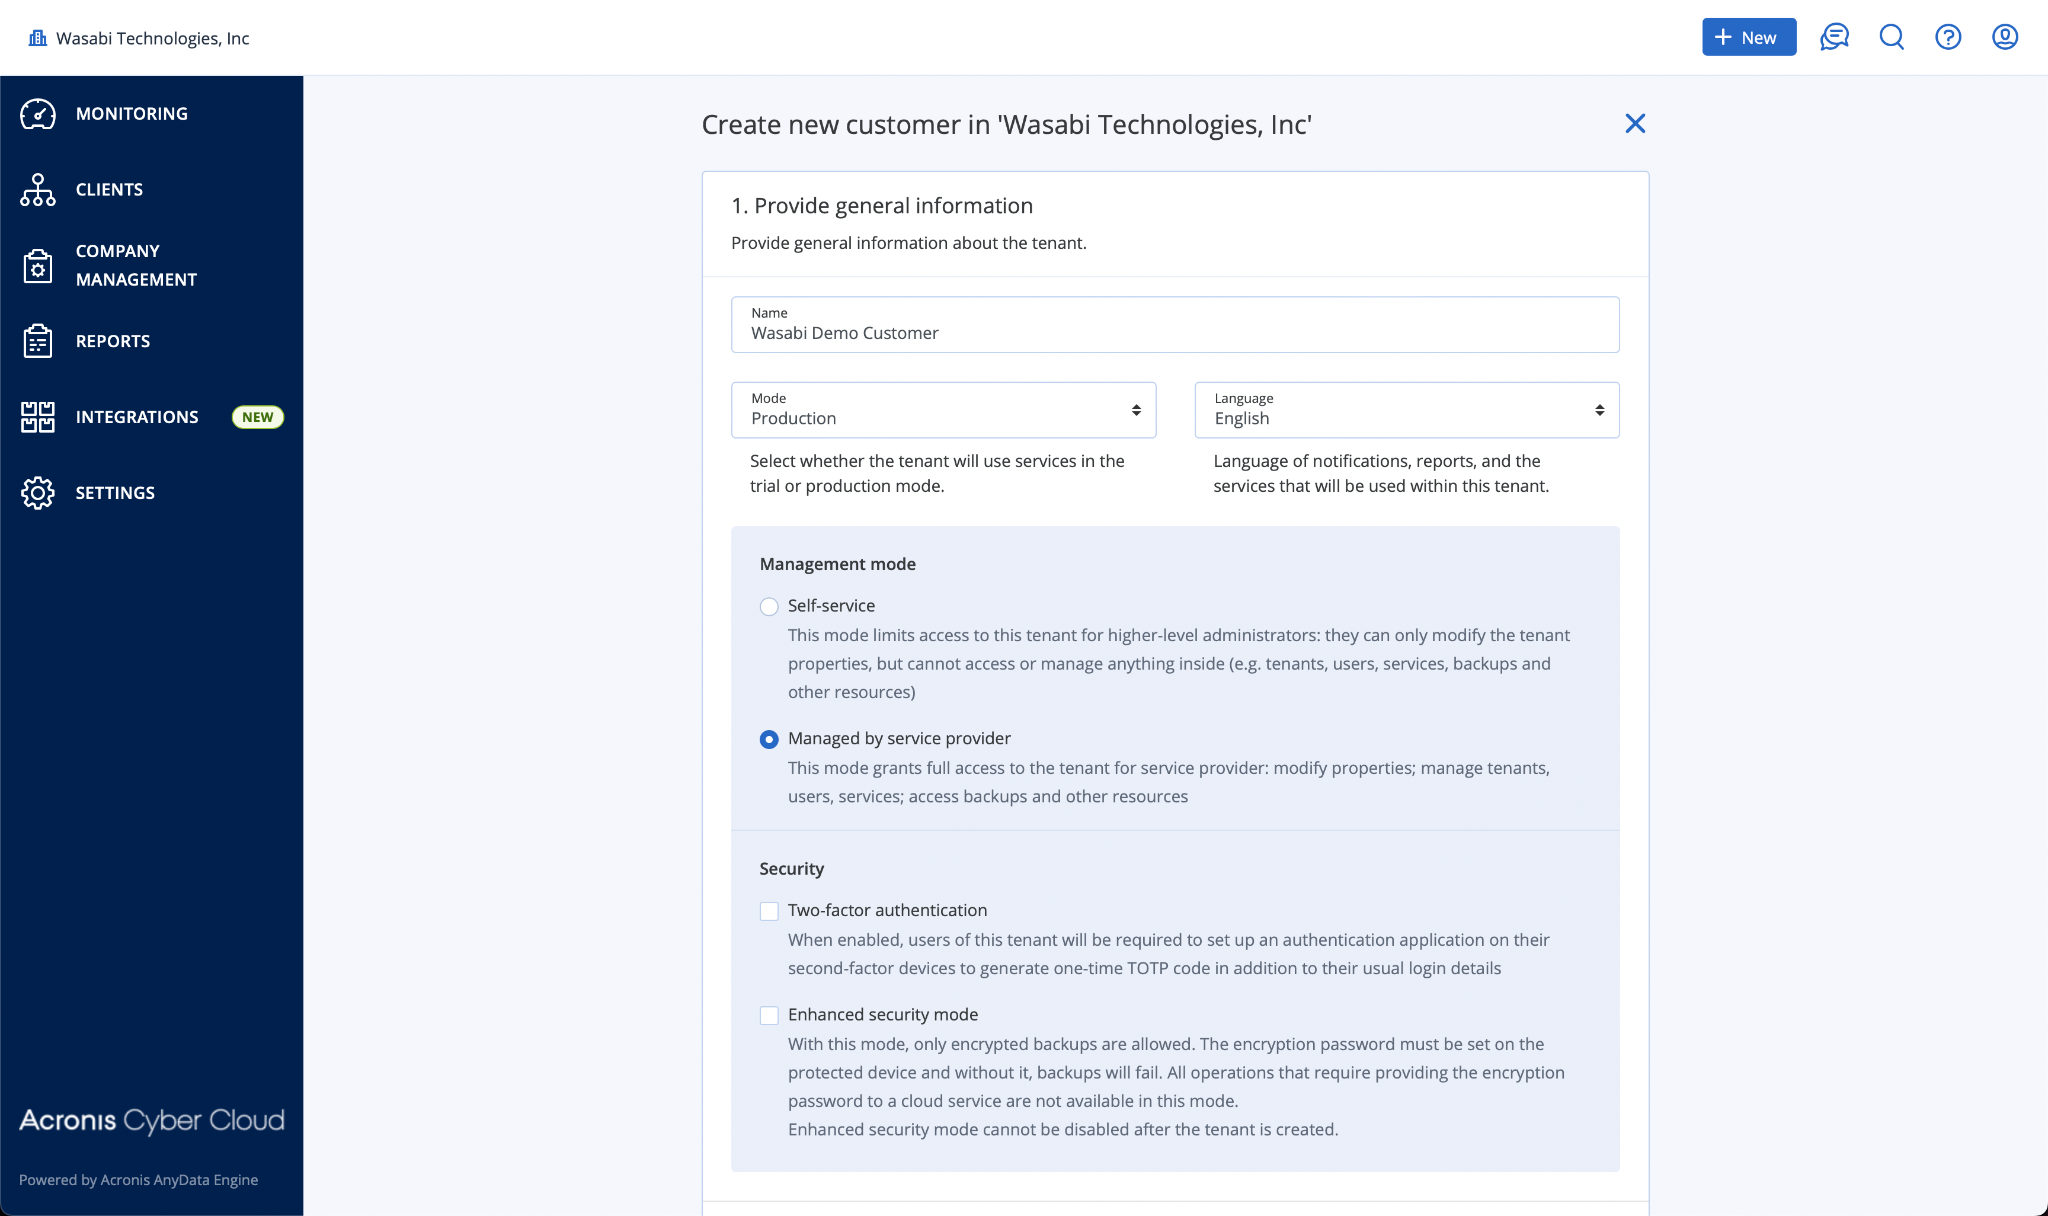
4.2 Enter Customer Details.&#x20;

***Note:** In this example, I have set the customer to “Production”, and chosen “Managed by Service Provider”. Your specific settings may differ depending on which other Acronis services you intend to offer.*

<figure><img src="https://cdn.document360.io/bef0a1ea-7768-4d5a-b520-c4fe2f7fafad/Images/Documentation/8376718899739.png" alt=""><figcaption></figcaption></figure>

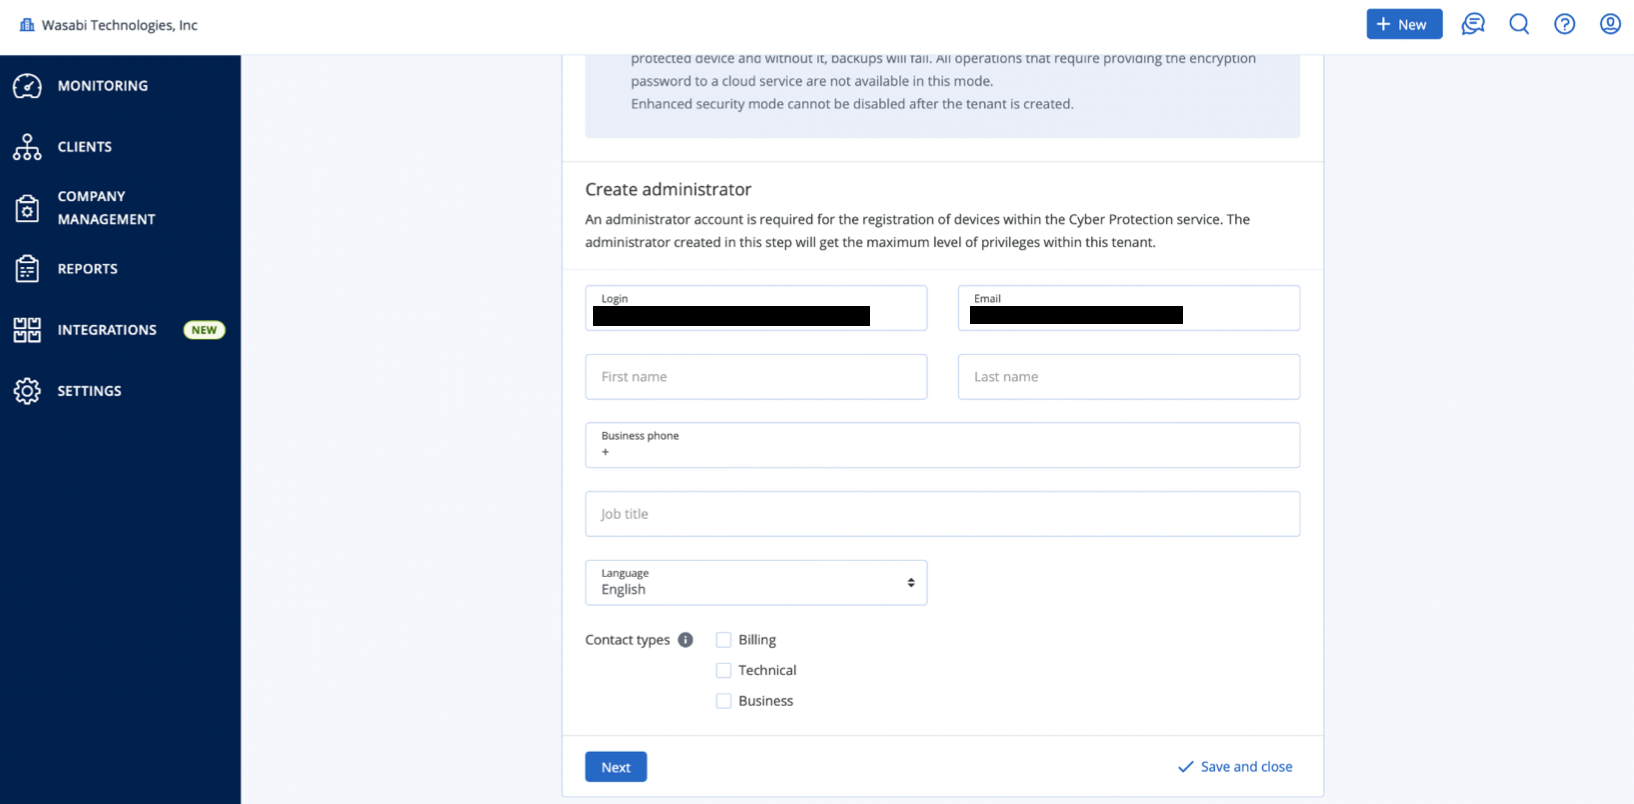
4.3 Create an Administrator, providing a username and an email address.

![mceclip13.png](https://cdn.document360.io/bef0a1ea-7768-4d5a-b520-c4fe2f7fafad/Images/Documentation/8376761203739.png)

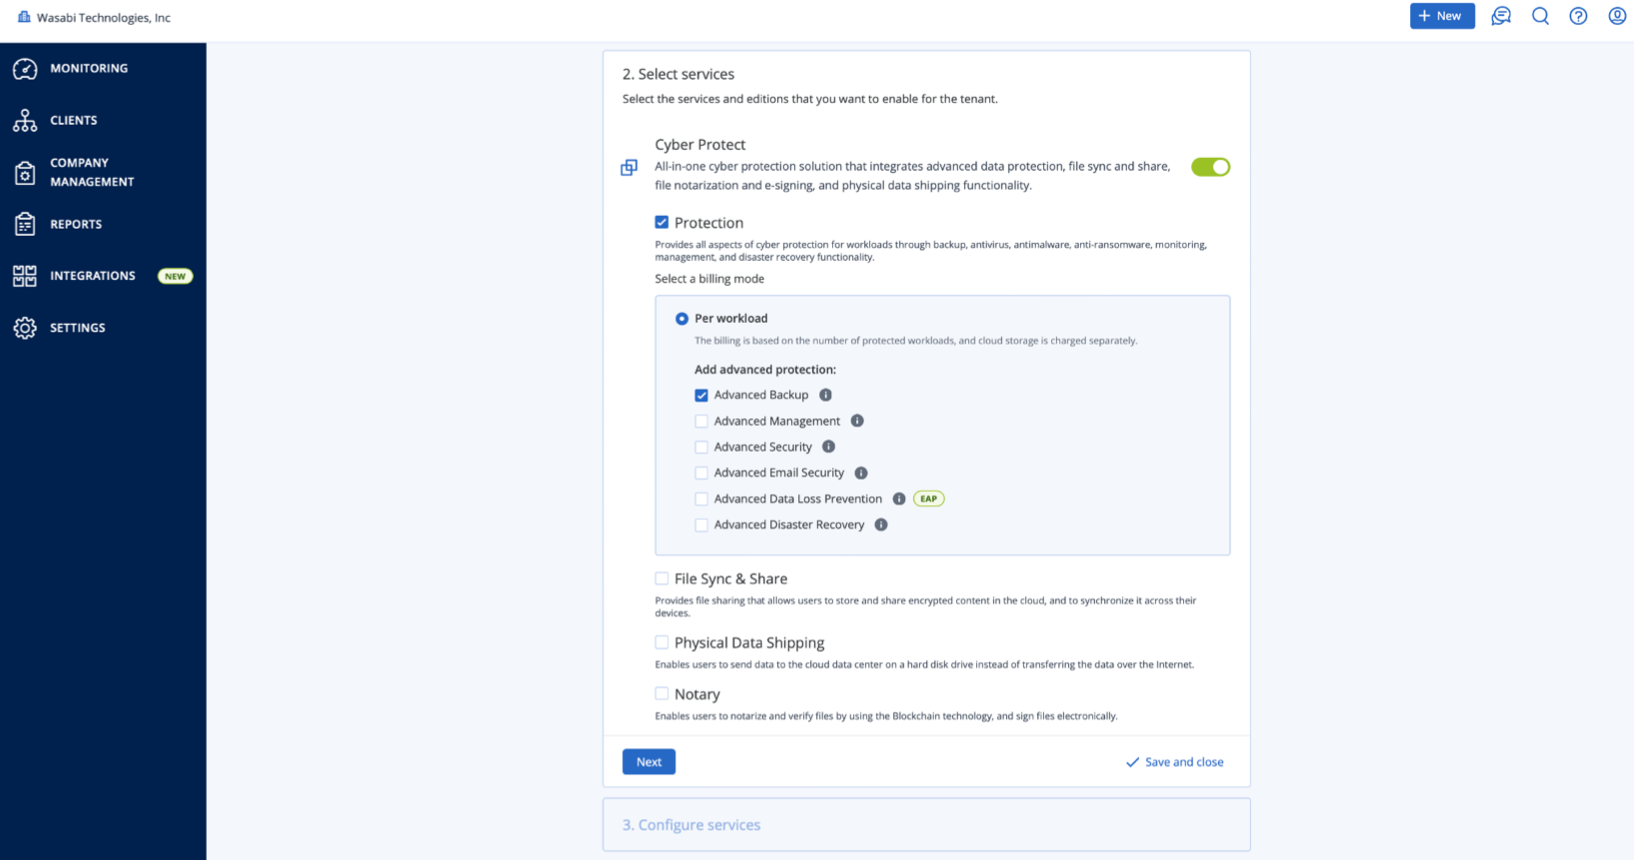
4.4 Select Services, then click “Next”.

***Note:** In this case, I have chosen the Backup Protection Service, as that will be the focus of the Neevcloud Storage Integration. If you plan on offering additional Acronis services, please be sure to discuss this with your Acronis Partner Representative.*

<figure><img src="https://cdn.document360.io/bef0a1ea-7768-4d5a-b520-c4fe2f7fafad/Images/Documentation/8376819488411.png" alt=""><figcaption></figcaption></figure>

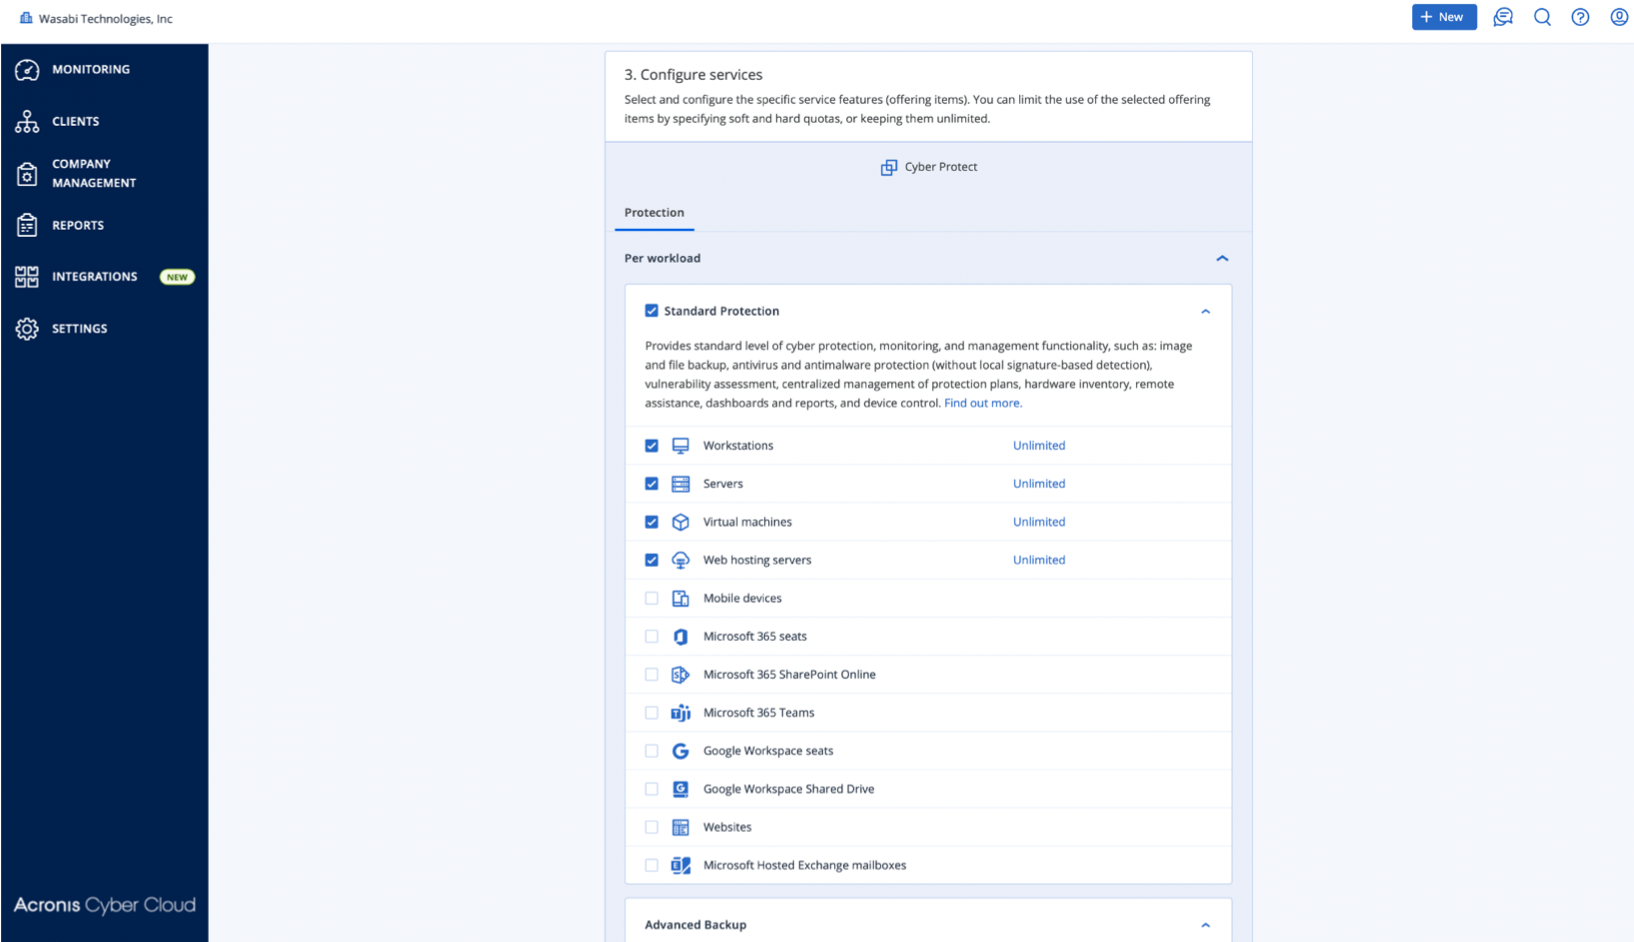
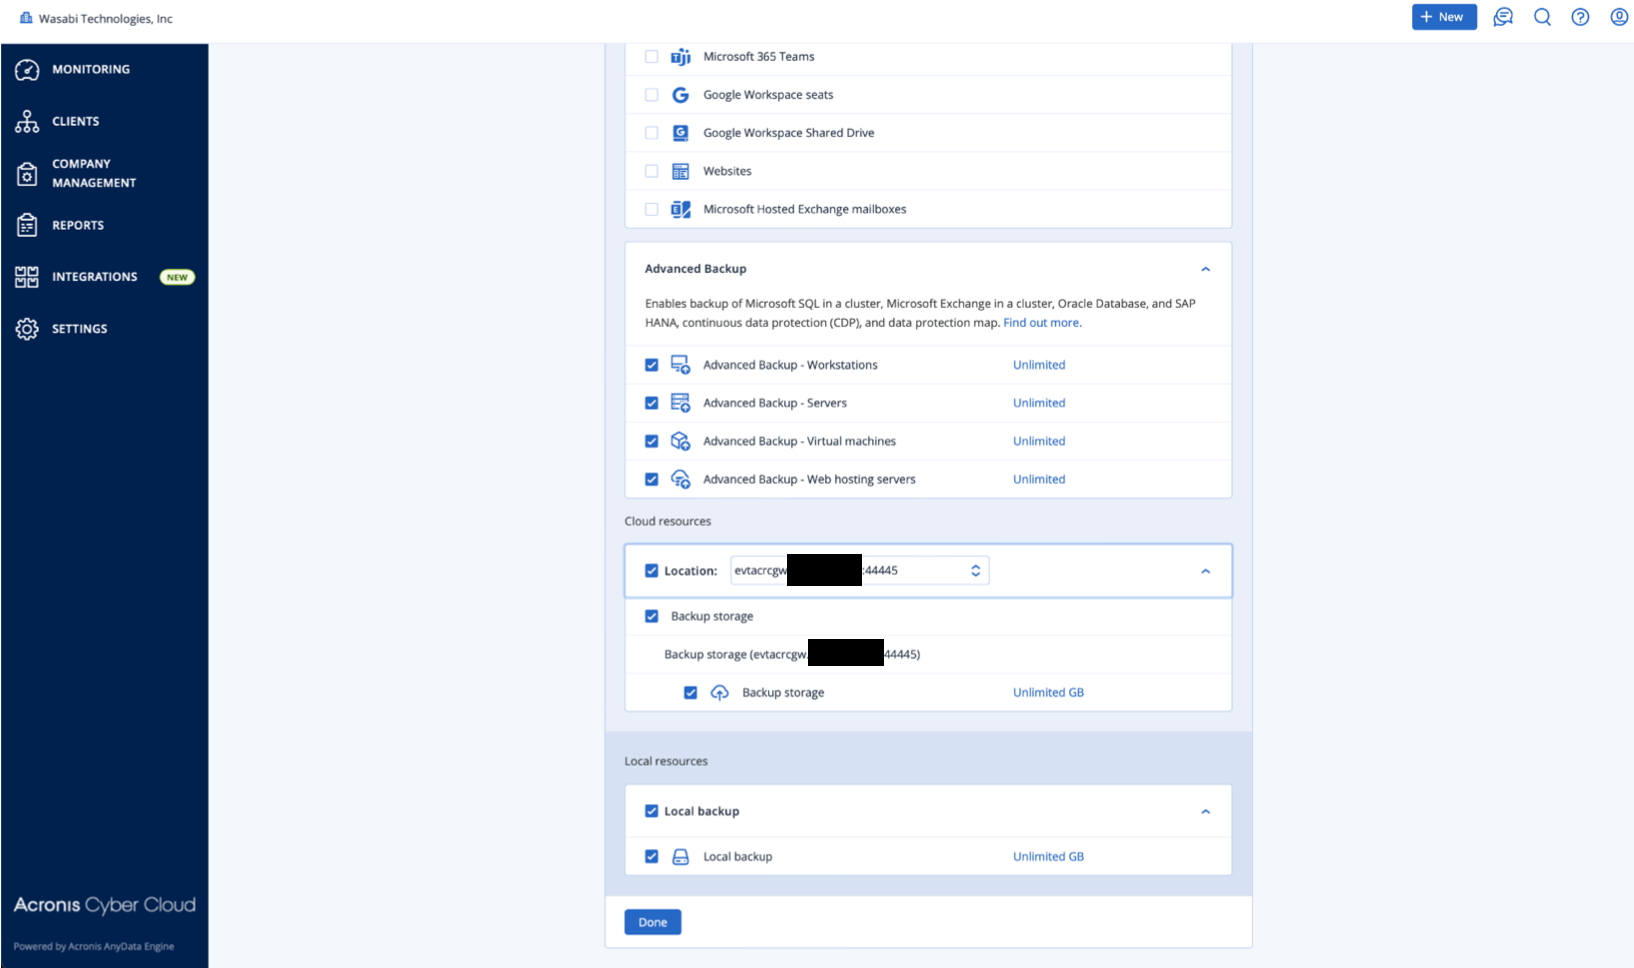
4.5 Configure Services.

<figure><img src="https://cdn.document360.io/bef0a1ea-7768-4d5a-b520-c4fe2f7fafad/Images/Documentation/8376873215003.png" alt=""><figcaption></figcaption></figure>

4.6 Choose the appropriate “Cloud resources” location. (the DNS address from step 3.7), then click “Done”.

<figure><img src="https://cdn.document360.io/bef0a1ea-7768-4d5a-b520-c4fe2f7fafad/Images/Documentation/8376915387163.png" alt="" width="375"><figcaption></figcaption></figure>

### 5. Back Up a Machine <a href="#id-5-back-up-a-machine" id="id-5-back-up-a-machine"></a>

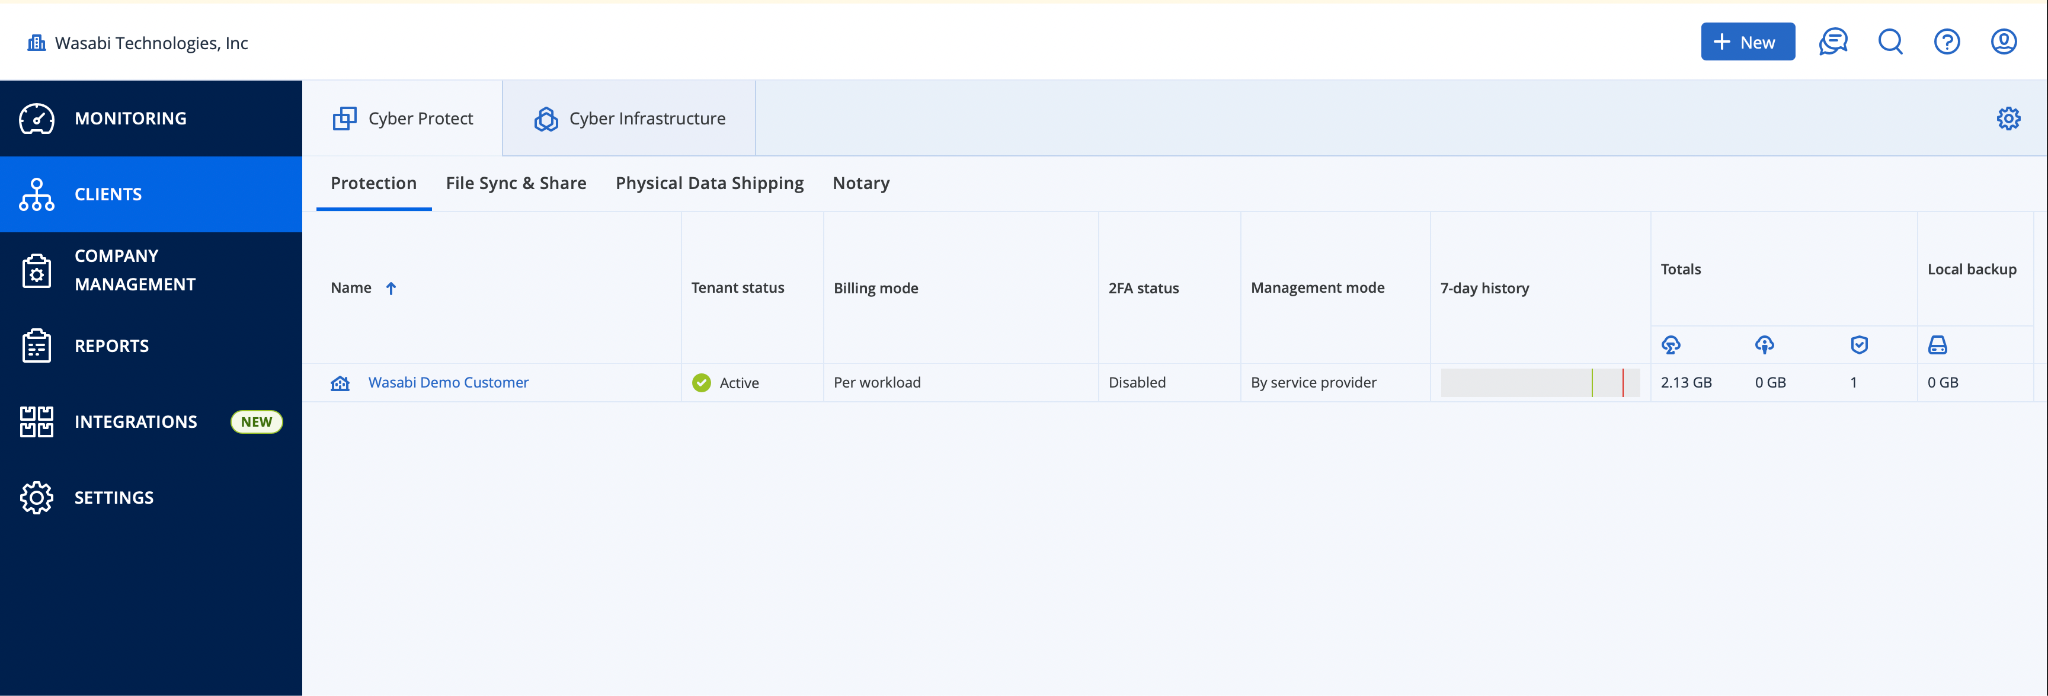
5.1 Click “Clients”, then click the name of the client you want to manage.

<figure><img src="https://cdn.document360.io/bef0a1ea-7768-4d5a-b520-c4fe2f7fafad/Images/Documentation/8376918703387.png" alt="" width="375"><figcaption></figcaption></figure>

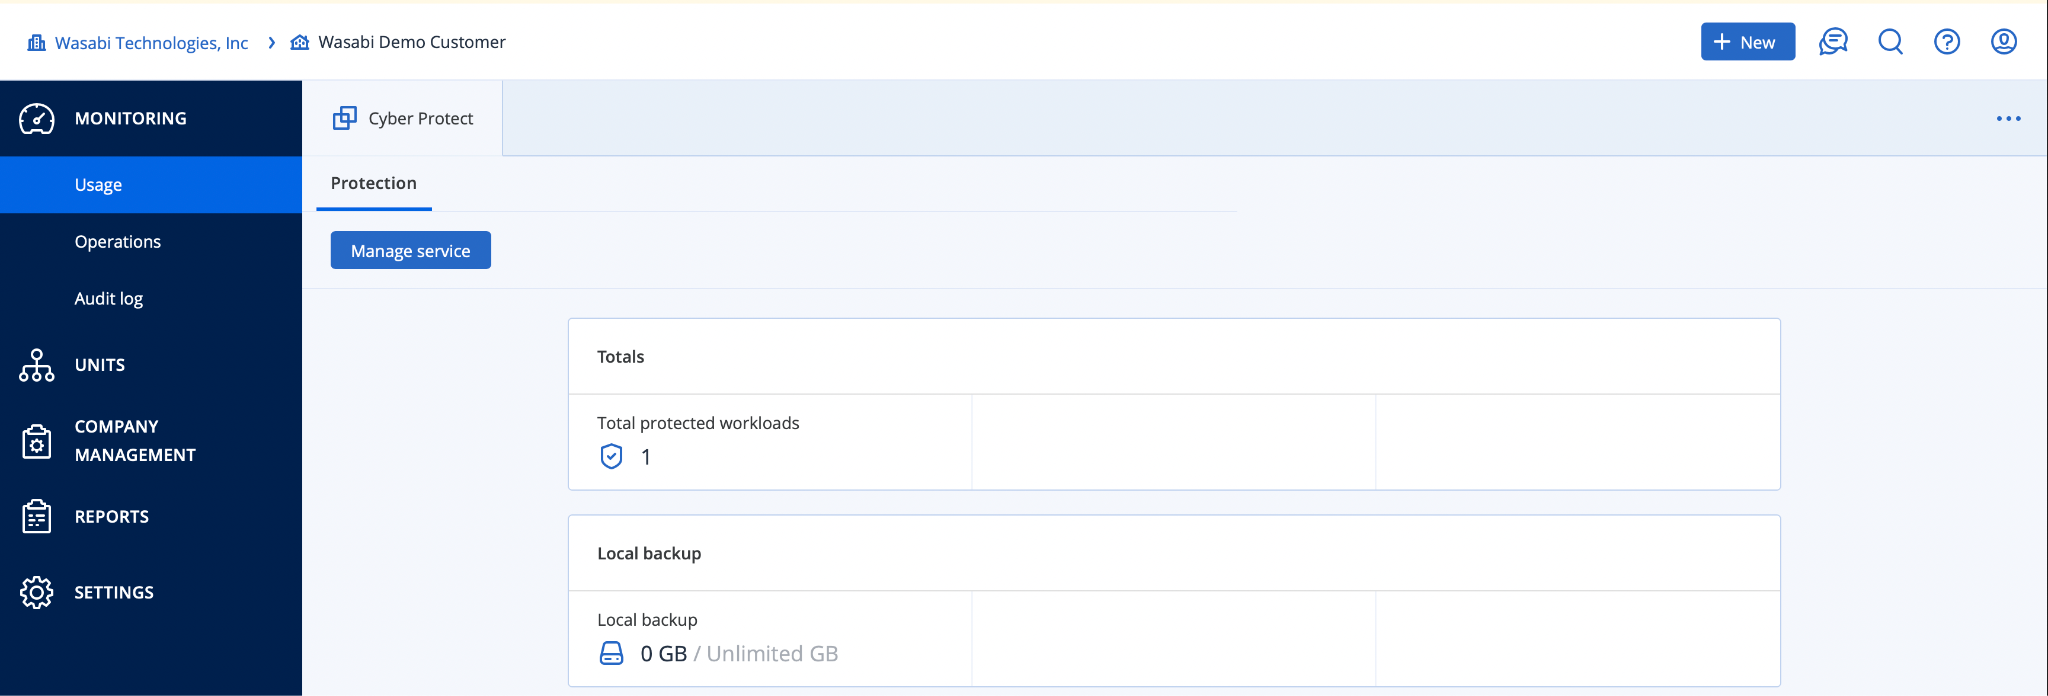
5.2 Click “Manage service”.

![blobid22.png](https://cdn.document360.io/bef0a1ea-7768-4d5a-b520-c4fe2f7fafad/Images/Documentation/8376904766363.png)

5.3 Click “Devices > All Devices”.

![blobid23.png](https://cdn.document360.io/bef0a1ea-7768-4d5a-b520-c4fe2f7fafad/Images/Documentation/8376973044635.png)

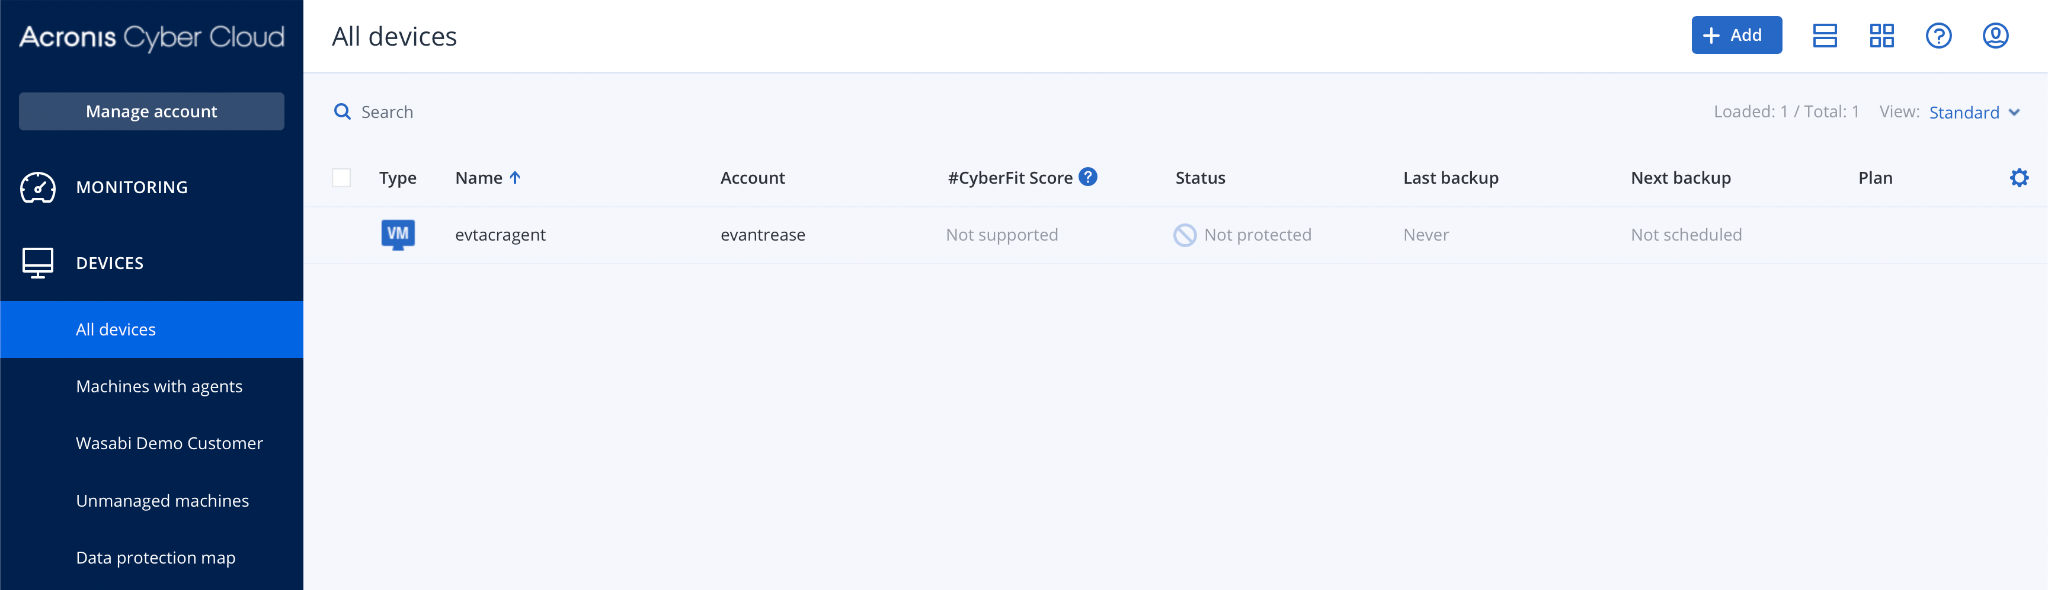
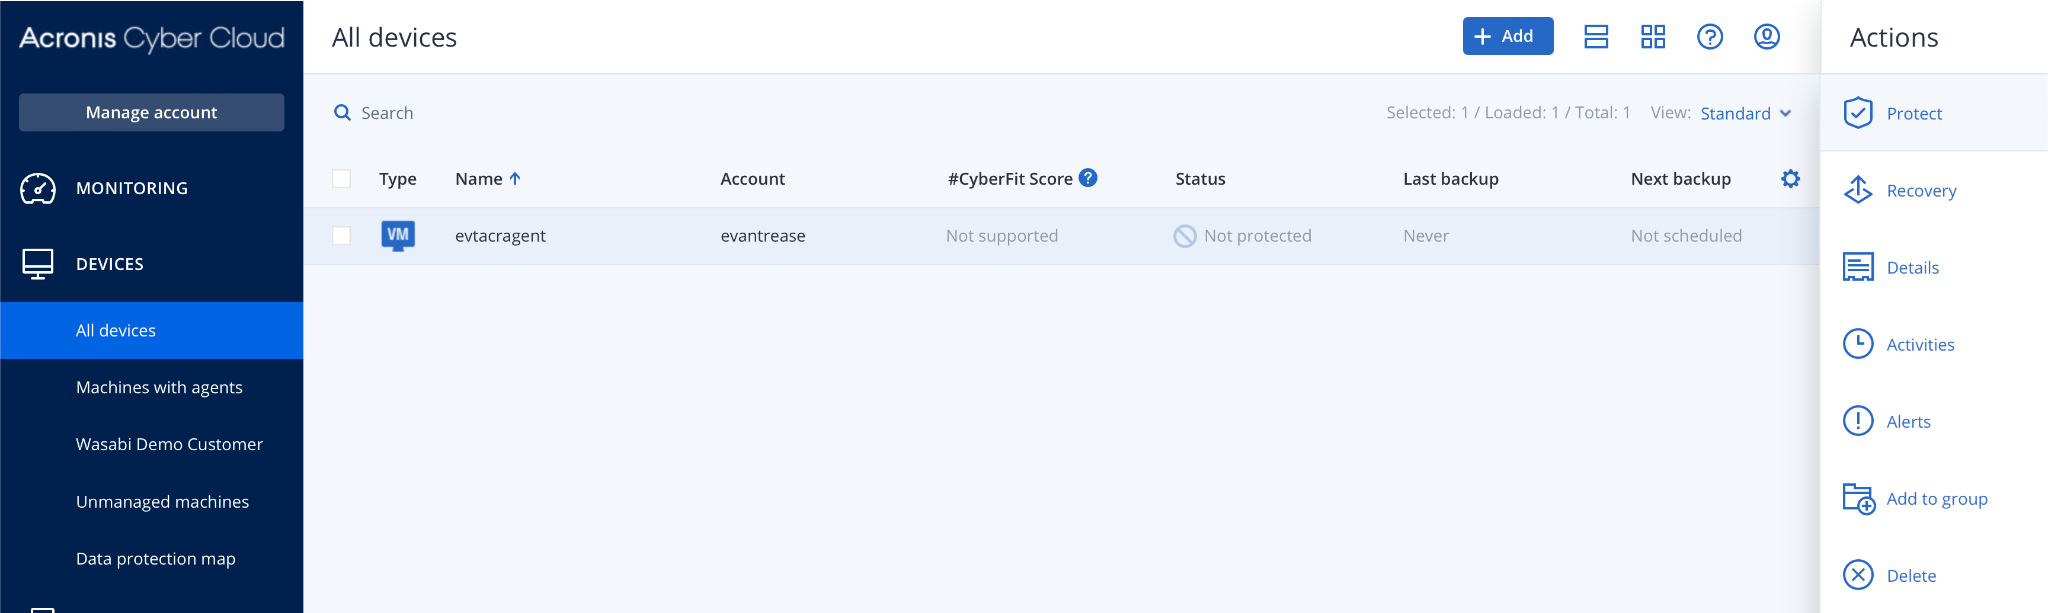
5.4 Click the name of the device, then click “Protect”.

![blobid24.png](https://cdn.document360.io/bef0a1ea-7768-4d5a-b520-c4fe2f7fafad/Images/Documentation/8376974406683.png)

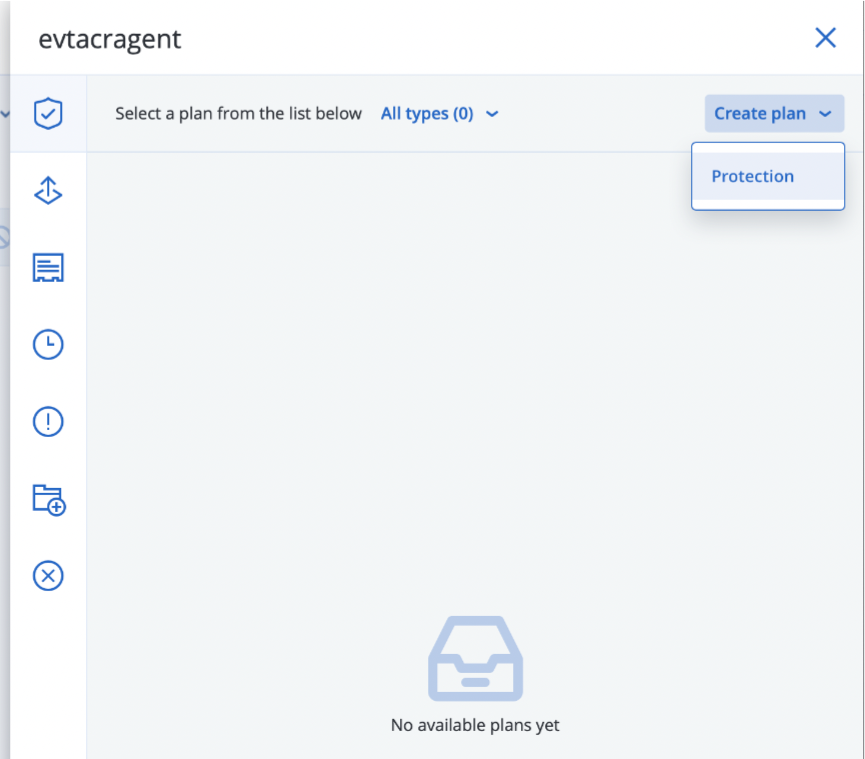
5.5 Create a protection plan by clicking “Create plan > Protection”.

![blobid28.png](https://cdn.document360.io/bef0a1ea-7768-4d5a-b520-c4fe2f7fafad/Images/Documentation/8377004348827.png)

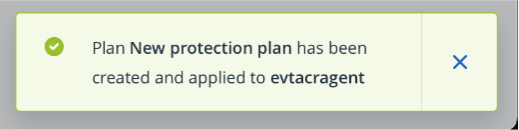
5.6 In this example we are creating a “Backup” plan, targeting “Cloud storage”. Set the appropriate settings as shown below, and then click “Create”.

![mceclip17.png](https://cdn.document360.io/bef0a1ea-7768-4d5a-b520-c4fe2f7fafad/Images/Documentation/8377015814683.png)

![blobid27.png](https://cdn.document360.io/bef0a1ea-7768-4d5a-b520-c4fe2f7fafad/Images/Documentation/8376978921627.png)

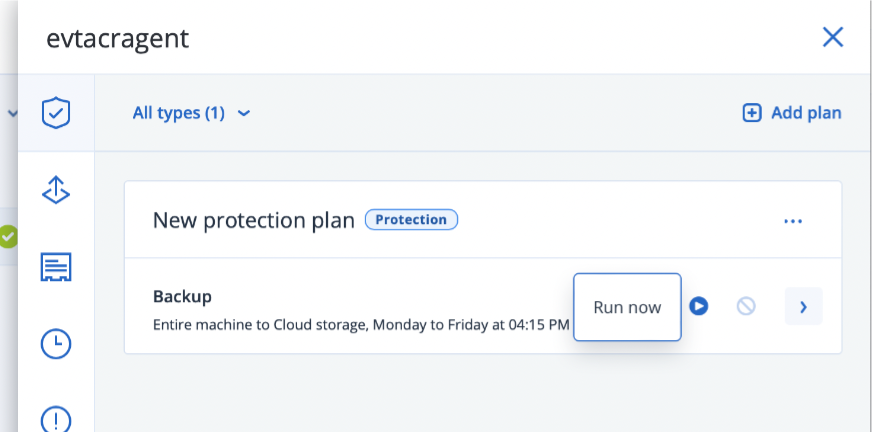
5.7 Click “Run Now”.

![blobid29.png](https://cdn.document360.io/bef0a1ea-7768-4d5a-b520-c4fe2f7fafad/Images/Documentation/8377074129563.png)

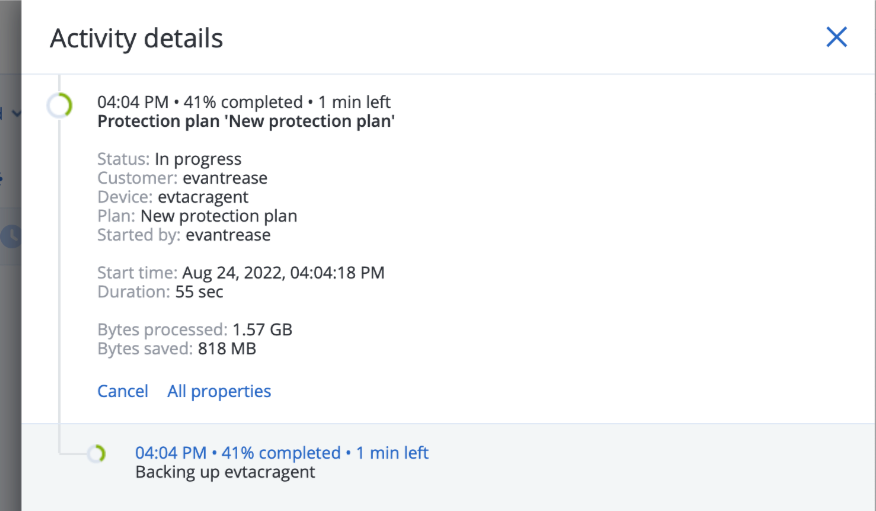
5.8 Check the status of the job via the “Activities” tab.

![blobid30.png](https://cdn.document360.io/bef0a1ea-7768-4d5a-b520-c4fe2f7fafad/Images/Documentation/8377058656539.png)

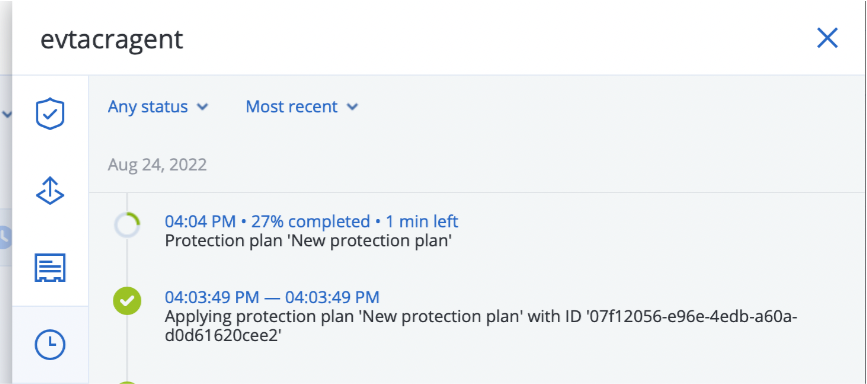
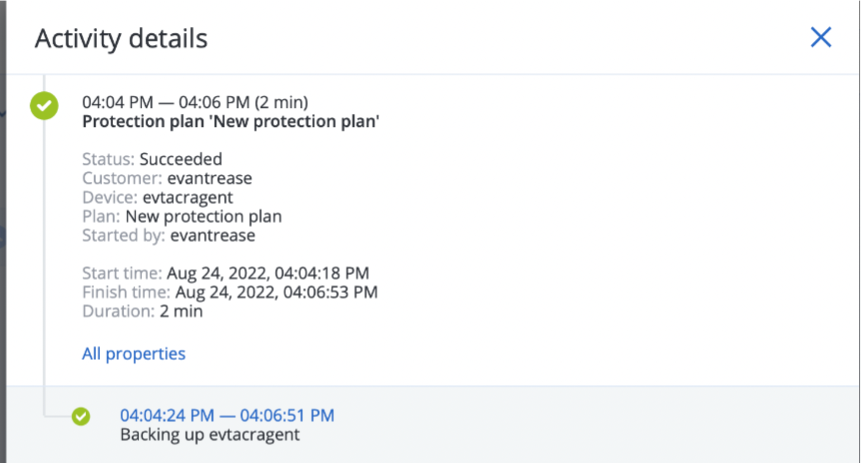
5.9 Click the running job to see more information. The job will show “Status: Succeeded” when it is completed.

![blobid31.png](https://cdn.document360.io/bef0a1ea-7768-4d5a-b520-c4fe2f7fafad/Images/Documentation/8377077378075.png)![blobid32.png](https://cdn.document360.io/bef0a1ea-7768-4d5a-b520-c4fe2f7fafad/Images/Documentation/8377078702619.png)

### 6. Verify Data <a href="#id-6-verify-data" id="id-6-verify-data"></a>

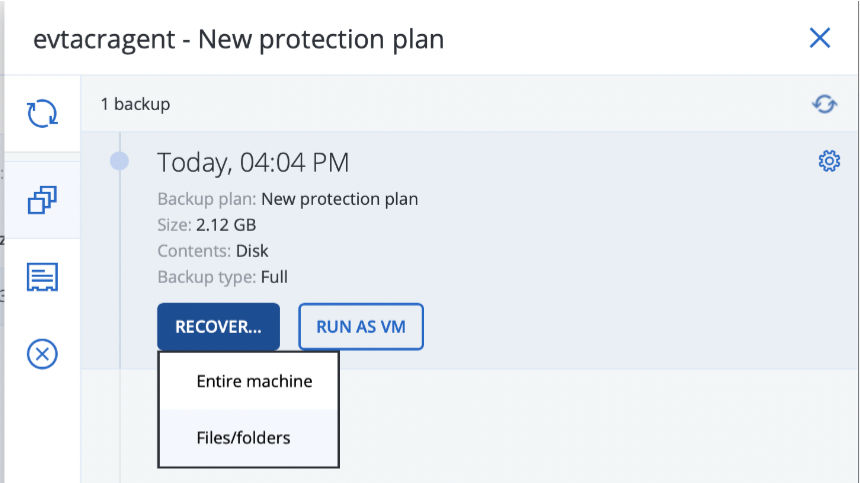
6.1 Confirm/Restore/Browse Backup Data, Click “Backup Storage > Show Backups”.

![blobid33.png](https://cdn.document360.io/bef0a1ea-7768-4d5a-b520-c4fe2f7fafad/Images/Documentation/8377080288411.png)

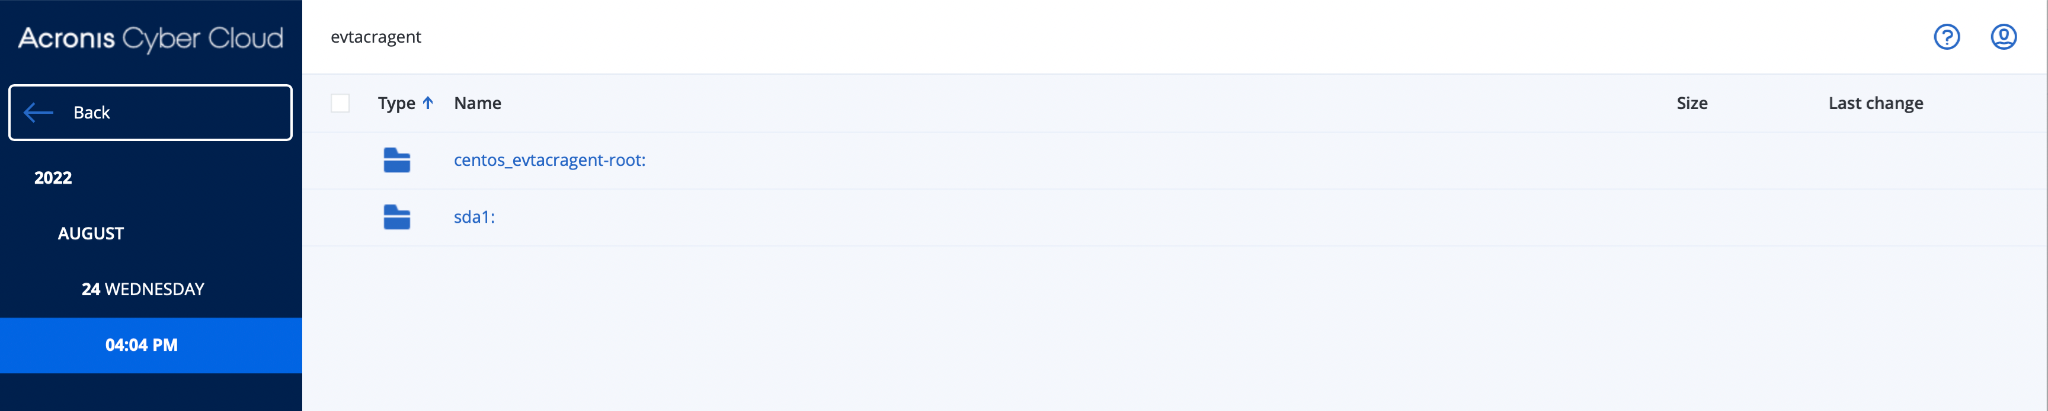
6.2 Click “Recover > Files/folders”.

![blobid34.png](https://cdn.document360.io/bef0a1ea-7768-4d5a-b520-c4fe2f7fafad/Images/Documentation/8377064597275.png)

6.3 Click the partition that you would like to view.

<figure><img src="https://cdn.document360.io/bef0a1ea-7768-4d5a-b520-c4fe2f7fafad/Images/Documentation/8377149642267.png" alt=""><figcaption></figcaption></figure>

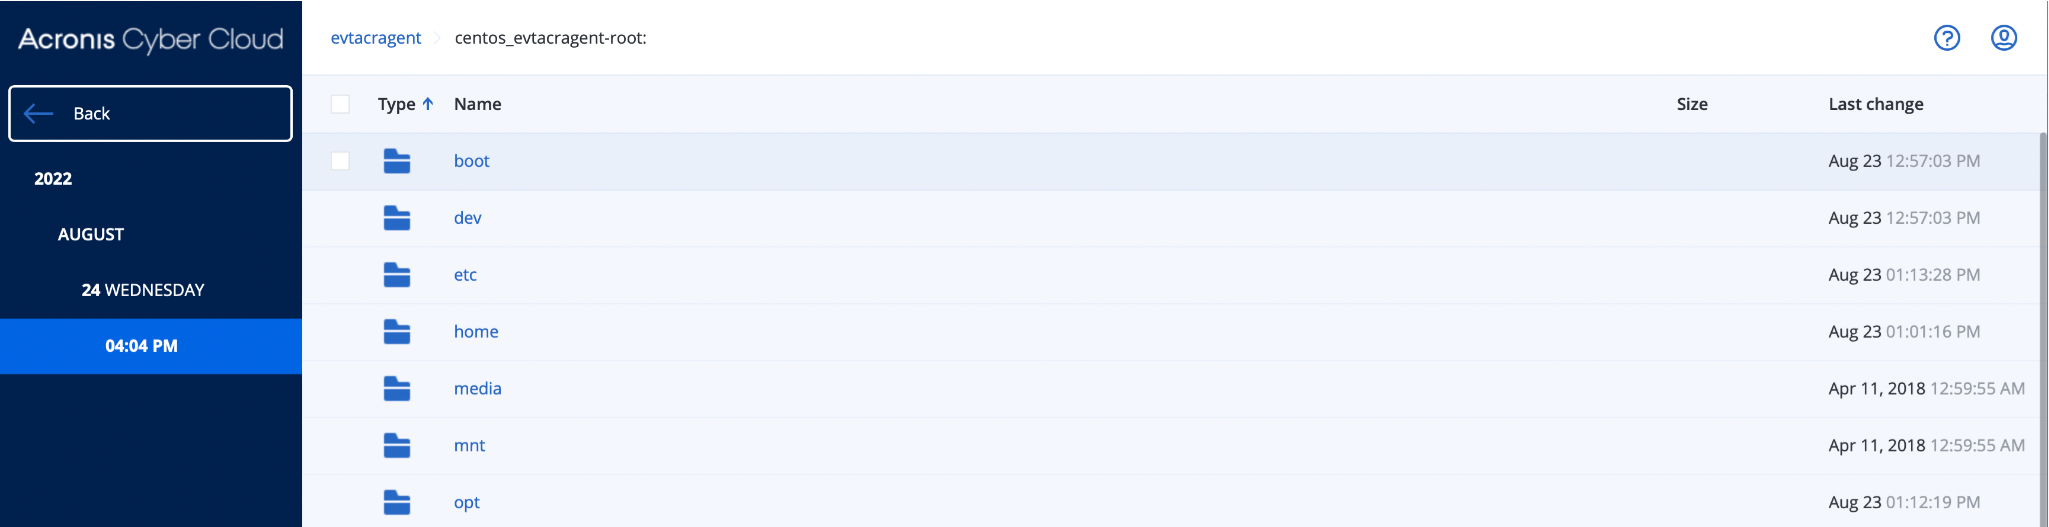
6.4 You can now browse the directory structure, and recover/download your desired file.

<figure><img src="https://cdn.document360.io/bef0a1ea-7768-4d5a-b520-c4fe2f7fafad/Images/Documentation/8377134142235.png" alt=""><figcaption></figcaption></figure>

6.5 You can also verify that data has been written, by drilling into the NeevCloud bucket.

<figure><img src="https://1876135298-files.gitbook.io/~/files/v0/b/gitbook-x-prod.appspot.com/o/spaces%2FEC5NwtFshv6EATOemuUn%2Fuploads%2FaoKJJd5d8FUL4rmabavd%2Fimage.png?alt=media&#x26;token=f4e1974a-273f-4481-8c40-1a5d1125f671" alt=""><figcaption></figcaption></figure>

***Note:** The data Acronis uploads to **NeevCloud** is in a proprietary format, split into chunks for efficient transport over the internet. You will need to use the Acronis software to browse and restore this data.*


---

# Agent Instructions: Querying This Documentation

If you need additional information that is not directly available in this page, you can query the documentation dynamically by asking a question.

Perform an HTTP GET request on the current page URL with the `ask` query parameter:

```
GET https://docs.neevcloud.com/neevcloud-guide/neevcloud-remote-backup-and-dr/acronis-backup-gateway-with-neevcloud.md?ask=<question>
```

The question should be specific, self-contained, and written in natural language.
The response will contain a direct answer to the question and relevant excerpts and sources from the documentation.

Use this mechanism when the answer is not explicitly present in the current page, you need clarification or additional context, or you want to retrieve related documentation sections.
